
GSD
React-Intl: An API and Component Analysis
Posted by Zain Sajjad on October 13, 2023
Table of contents
Post updated by Deborah Emeni.
In recent years, businesses have realized the advantages of creating applications that seamlessly adapt to diverse languages and cultures. This not only improves accessibility for users but also enhances personalization and fosters inclusivity, resulting in a better overall user experience. Luckily, developers can utilize React-Intl, an internationalization library in React, to easily implement features such as text formatting and translation, currency and number handling, and date formatting, all based on cultural preferences.
This article will explore React-intl, what it is and how it works, and a demo of how to use it to internationalize your React applications.
What is React-Intl?
React-intl is a useful library for React developers who want to make their applications accessible to users of various languages and cultures. It provides many tools for internationalizing React applications, including APIs and components.
The process of creating an application that can accommodate multiple languages or cultural preferences is referred to as Internationalization. Using React-intl, developers can easily create applications that adapt to different languages. React-intl provides functionalities, including displaying text in multiple languages, formatting dates and times according to local conventions, displaying currency symbols in the correct format, and handling numbers based on the user's region.
With React-intl, developers can also create versatile and inclusive applications that cater to a global audience, improving user experience and making their software accessible to people from diverse cultural backgrounds.

The anatomy of React-Intl
React-intl offers several useful components for achieving internationalization in React applications. Let’s go through the component library of React-intl and see how we can develop more scalable multilingual apps.
Integration
React-intl uses the provider pattern to supply messages to the component tree of your app. The most common usage is to wrap your root React component with <IntlProvider> and configure it with the user's current locale and the corresponding translated strings/messages:
This allows configuration like the current locale and set of translated strings/messages to be provided at the root of a component tree and made available to all React-intl components. It is a must that all apps using React-intl must use the <IntlProvider> component.
Here’s a code sample using the ReactDOM.render method to render an application with internationalization support using the React-intl library:
import React from 'react';
import ReactDOM from 'react-dom';
import { IntlProvider } from 'react-intl';
import App from './App';

const translationsFromLocale = {
  // Your translations go here
};

ReactDOM.render(
  <IntlProvider locale="en" messages={translationsFromLocale}>
    <App />
  </IntlProvider>,
  document.getElementById('app')
);
Once your app is wrapped in IntlProvider you’re all set to use any of the React-intl components in your application’s components.
Number Formatting
React-intl supports locale-based number formatting with two major features:
-
Pluralization
-
Unit display
Pluralization
Pluralization: For pluralization, React-intl uses native Intl.PluralRules are available for most of the modern browsers. For browsers that don’t have PluralRules, you can use polyfill provided by React-intl.
Polyfill:
npm install @formatjs/intl-pluralrules
And initialize it at the top of your app, by requiring this polyfill.
If (!Intl.PluralRules){

   require("@formatjs/intl-pluralrules/polyfill");

   require("@formatjs/intl-pluralrules/dist/local-date/en"); //Add locale

}
Usage:
The pluralization component allows you to define messages against `zero`, `one`, `two`, `few`, `many` or `other` values. It renders the message based on the value of the number given.
<FormattedNumber

 value={messagesCount}

 zero="All Caught up"

 one="Just single message"

 two="Two message unseen"

 few="A few message awaiting you"

 many="A lot of things to catch up"

 other="messages"

/>
Units Display
The other part of the FormattedNumber display is rendering value with its unit. To use the unit display we have to install a polyfill.
Polyfill:
npm install @formatjs/intl-unified-numberformat
And initialize it before using anywhere in the app.
import { UnifiedNumberFormat } from "@formatjs/intl-unified-numberformat";


UnifiedNumberFormat.__addLocaleData(

 require("@formatjs/intl-unified-numberformat/dist/locale-data/en.json") // locale-data for en

);
Usage:
<FormattedNumber value={1000} unit="kilogram" unitDisplay="long" />You can add any of the units from the given list and display its long, short or narrow versions.
Date Formatting
One of the most challenging tasks for frontend developers today is to render correct dates and times. Moment.js, date-fns and many other similar libraries are trying to solve this problem in different manners. As far as the rendering of dates is concerned, React-intl is the best solution, providing full control over date display as it uses Intl.DateTimeFormat under the hood.
Usage:
<FormattedDate

   value={new Date(1459832991883)}

   year="numeric|2-digit"

   month="long|short|narrow|numeric|2-digit"

   day="numeric|2-digit"

   era="long|short|narrow"

/>
Here are the details of props for this component
-
`year`: The representation of the year. Possible values are:
-
"numeric" (e.g., 2012)
-
"2-digit" (e.g., 12)
-
-
`month`:
-
"numeric" (e.g., 2)
-
"2-digit" (e.g., 02)
-
"long" (e.g., March)
-
"short" (e.g., Mar)
-
"narrow" (e.g., M). Two months may have the same narrow style for some locales (e.g. May's narrow style is also M).
-
-
`day`:
-
"numeric" (e.g., 1)
-
"2-digit" (e.g., 01)
-
-
`era`:
-
"long" (e.g., Anno Domini)
-
"short" (e.g., AD)
-
"narrow" (e.g., A)
-
Time Formatting
React-intl’s time formatting ships in two forms:
-
Simple Time Formatting
-
Relative Time Formatting
Simple Time Formatting:
It uses Intl.DateTimeFormat under the hood and renders time according to selected locale-given options.
Usage:
<FormattedTime

   value={new Date()}

   hour="numeric|2-digit"

   minute="numeric|2-digit"

   second="numeric|2-digit"

   timeZoneName="long|short|narrow"

/>
Here values of hours, minutes and seconds can be 2-digits or numeric, while timeZoneName can be "long" (e.g., British Summer Time) or "short" (e.g., GMT+1)
Relative TIme Formatting:
Relative time formatting is one of the distinguishing features available with react-intl. It allows developers to show more user-friendly dates for cases like time to start, time remaining before it ends, etc. React-intl updates this component with developer-defined frequency.
Polyfill:
For relative time formatting, react-intl relies on native Intl.RelativeTimeFormat that is available with most of the modern browsers excluding (IE 11 & Safari 12-). To support older browsers, we have to add polyfill provided by formatJS.
For installing polyfill:
npm install @formatjs/intl-relativetimeformat
If the browser does not support the native Intl.RelativeTimeFormat API, we must include and initialize the FormatJS polyfill at the top of the app. This polyfill adds browser support for Intl.RelativeTimeFormat and allows for relative time formatting in older browsers.
if (!Intl.RelativeTimeFormat) {

 require("@formatjs/intl-relativetimeformat/polyfill");

 require("@formatjs/intl-relativetimeformat/dist/locale-data/en"); // Add locale data for de

}Usage:
<FormattedRelativeTime value={0} numeric="auto" updateIntervalInSeconds={10} />FormattedRelativeTime takes the following props:
-
value: Represents the numeric difference at the time of the initial render. The component needs to be updated externally with the new value to trigger re-rendering. -
updateIntervalInSeconds: Determines the frequency at which the component should re-render and display the updated value. It does not calculate the next value automatically; the value needs to be updated externally. -
numeric: Controls the display format of the relative time. It can be set to 'always' to display the relative time in a numeric format (e.g., "1d ago" for "1 day ago"), or 'auto' to allow the component to choose an appropriate format based on the value.
Utils:
React-intl uses the native Intl.RelativeTimeFormat API for relative time formatting. In environments without native support, a polyfill is required to calculate the difference between dates.
String Formatting
Another cool feature of react-intl is the `FormattedMessage` component. It allows you to combine many different formats in a string with rich formatting. Before we dive into the usage, let’s look into our examples for rich formatting, combining formats, and the props for this component.
-
Id: A unique identifier across the app for a message to distinguish it from different translations. -
defaulMessage: In the case where the id is not defined in the messages of the selected locale, react-intl uses this message as a fallback. -
description: This value helps cross-functional teams to understand the scope of the message and where it is used. -
values: Object of values accessed in the message. -
tagName: By default, It will render the formatted string into a React.Fragment. If you need to customize rendering, you can wrap it with another React element (recommended), specify a different tagName (e.g., 'div'), or pass a function as the child.
Let's explore some examples to understand it further.
Combining Different Formats:
In this example, we will combine number and plural formatting with our simple string message.
<FormattedMessage

   id="combination"

   defaultMessage="Hello you have {count, number} {count, plural, one {Message} other {Messages}}"

   description="Combination for formats"

   values={{

     count: 1000

   }}

   tagName="p"

 />
Here you can see `values`, the object has the `count` key that is being used to display the number and plural value within a string.
Rich Text Formatting:
Here you can integrate different tags within a single message, to show a rich text.
<FormattedMessage

id="richFormatting"

defaultMessage="To buy a shoe, <a>visit our website</a> and <cta>buy a shoe</cta> {icon}"

values={{

a: (...chunks) => (

<a

class="external_link"

target="_blank"

rel="noopener noreferrer"

href="https://www.shoe.com/"

>

{chunks}

</a>

),

cta: (...chunks) => <strong class="important">{chunks}</strong>,

icon: (

<svg

viewBox="0 0 24 24"

width="24"

height="24"

stroke="currentColor"

stroke-width="2"

fill="none"

stroke-linecap="round"

stroke-linejoin="round"

class="css-i6dzq1"

>
<circle cx="9" cy="21" r="1"></circle>

<circle cx="20" cy="21" r="1"></circle>

<path d="M1 1h4l2.68 13.39a2 2 0 0 0 2 1.61h9.72a2 2 0 0 0 2-1.61L23 6H6"></path>

</svg>

)
}}
/>
As seen, all tags accept function as the component with all chunks supplied as an argument to function, this gives us great flexibility to style apps better without breaking out of our translation paradigm.
Using React-intl to internationalize your apps
Here, you’ll see a demo showing the steps involved in internationalizing your app.
Setting up a React app
Before you set up a React app, ensure that you have the following:
-
Node.js installed (latest version v18.16.0)
-
Code editor (Visual Studio Code editor)
-
Terminal
-
Github
The complete source code can be found here.
Let’s set up the project using vite with this command:
npm create vite@latestAfter running the command, set your project name as intl_demo, select React from the list of frameworks and select TypeScript as the variant.
Next, change into the directory with this command:
cd intl_projectOpen the project in your code editor and initialize the project with this command:
npm init -yThen, install the project’s dependencies with this command:
npm installDelete the App.css and index.css files as you will not ne using them in this project. Then, create a components folder with two files namely LandingPage.tsx and style.css. 1In the LandingPage.tsx file, paste the following code:
import "./style.css";
import bg1 from "../assets/bg-1.png";

import ico1 from "../assets/ico1.png";
import ico2 from "../assets/ico2.png";
import ico3 from "../assets/ico3.png";
import ico4 from "../assets/ico4.png";

export default function LandingPage() {
  return (
    <div className="c-wrapper">
      <nav>
        <div className="logo">
          <span> narco. </span>
        </div>
        <div className="menu-wrapper">
          <div className="menu">
            <ul>
              <li>sales</li>
              <li>favorite</li>
              <li>lookbook</li>
              <li>about</li>
            </ul>
          </div>
          <div className="action">
            <div className="cart-btn">
              <svg xmlns="http://www.w3.org/2000/svg" height="48" viewBox="0 96 960 960" width="48">
                <path d="M220 976q-24 0-42-18t-18-42V396q0-24 18-42t42-18h110v-10q0-63 43.5-106.5T480
                176q63 0 106.5 43.5T630 326v10h110q24 0 42 18t18 42v520q0 24-18 42t-42
                18H220Zm0-60h520V396H630v90q0 12.75-8.675 21.375-8.676 8.625-21.5 8.625-12.825
                0-21.325-8.625T570 486v-90H390v90q0 12.75-8.675 21.375-8.676 8.625-21.5 8.625-12.825
                0-21.325-8.625T330 486v-90H220v520Zm170-580h180v-10q0-38-26-64t-64-26q-38 0-64 26t-26
                64v10ZM220 916V396v520Z"/>
              </svg>
              <span>Cart</span>
            </div>
            <div className="account">
              <div> O </div>
            </div>
          </div>
        </div>
      </nav>

      <main>
        <section>
          <div>
            <h1>Get a perfect & luxurious looks with us</h1>
            <div className="flex action-b">
              <div>
                <div>
                  <button className="explore-btn"> Explore More </button>
                </div>
              </div>
              <div>
                We have a lot of top collects from various top brands and experienced fashion designers around the world.
              </div>
            </div>
          </div>
          <div>
            <div className="bg-1">
              <img src={bg1} />
            </div>
          </div>
        </section>
        <section className="ico">
          <div>
            <img src={ico1} />
          </div>
          <div>
            <img src={ico2} />
          </div>
          <div>
            <img src={ico3} />
          </div>
          <div>
            <img src={ico4} />
          </div>
        </section>
      </main>

      <footer></footer>
    </div>
  )
}
Then, paste the following in the style.css file:
* {
  box-sizing: border-box;
  margin: 0;
  padding: 0;
  border: 1px solid rgba(255, 0, 0, .3);
}

.c-wrapper {
  max-width: 1000px;
  margin: 0 auto;
}

nav {
  display: flex;
  align-items: center;
  justify-content: space-between;
}

nav .menu ul {
  display: flex;
  list-style: none;
  text-transform: uppercase;
}

nav .menu-wrapper {
  display: flex;
}

nav .menu ul li {
  padding: .8rem 2rem;
}

nav .action {
  display: flex;
}

nav .cart-btn {
  display: flex;
  align-items: center;
}

nav .cart-btn svg {
  height: 2rem;
}

nav .action {
  display: flex;
  align-items: center;
  gap: 1rem;
  padding-left: 2rem;
  padding-right: 2rem;
}
nav .account {
  display: flex;
}

nav .account div {
  display: flex;
  width: 2rem;
  align-items: center;
  justify-content: center;
  border-radius: 50%;
  aspect-ratio: 1/1;
}

main > section {
  display: flex;
}

main .bg-1 {
  object-fit: cover;
}

main > section > div > h1 {
  font-size: 5rem;
  padding: 4rem 0;
}

.flex {
  display: flex;
}

.flex.action-b {
  gap: 2rem;
}

.flex.action-b > div {
  width: 100%;
}
In your main.tsx file, delete this import statement:
import './index.css'In your App.tsx file, delete these import statements:
import { useState } from 'react';
import reactLogo from './assets/react.svg';
import viteLogo from '/vite.svg';
import './App.css';
Within the src directory, create a component folder with two files namely LandingPage.tsx and style.css. Copy and paste the following code in the LandingPage.tsx:
import "./style.css";
import bg1 from "../assets/bg-1.png";

import ico1 from "../assets/ico1.png";
import ico2 from "../assets/ico2.png";
import ico3 from "../assets/ico3.png";
import ico4 from "../assets/ico4.png";

export default function LandingPage() {
  return (
    <div className="c-wrapper">
      <nav>
        <div className="logo">
          <span> narco. </span>
        </div>
        <div className="menu-wrapper">
          <div className="menu">
            <ul>
              <li>sales</li>
              <li>favorite</li>
              <li>lookbook</li>
              <li>about</li>
            </ul>
          </div>
          <div className="action">
            <div className="cart-btn">
              <svg xmlns="http://www.w3.org/2000/svg" height="48" viewBox="0 96 960 960" width="48">
                <path d="M220 976q-24 0-42-18t-18-42V396q0-24 18-42t42-18h110v-10q0-63 43.5-106.5T480
                176q63 0 106.5 43.5T630 326v10h110q24 0 42 18t18 42v520q0 24-18 42t-42
                18H220Zm0-60h520V396H630v90q0 12.75-8.675 21.375-8.676 8.625-21.5 8.625-12.825
                0-21.325-8.625T570 486v-90H390v90q0 12.75-8.675 21.375-8.676 8.625-21.5 8.625-12.825
                0-21.325-8.625T330 486v-90H220v520Zm170-580h180v-10q0-38-26-64t-64-26q-38 0-64 26t-26
                64v10ZM220 916V396v520Z"/>
              </svg>
              <span>Cart</span>
            </div>
            <div className="account">
              <div> O </div>
            </div>
          </div>
        </div>
      </nav>

      <main>
        <section>
          <div>
            <h1>Get a perfect & luxurious looks with us</h1>
            <div className="flex action-b">
              <div>
                <div>
                  <button className="explore-btn"> Explore More </button>
                </div>
              </div>
              <h3>
                We have a lot of top collects from various top brands and experienced fashion designers around the world.
              </h3>
            </div>
          </div>
          <div>
            <div className="bg-1">
              <img src={bg1} />
            </div>
          </div>
        </section>
        <section className="ico">
          <div>
            <img src={ico1} />
          </div>
          <div>
            <img src={ico2} />
          </div>
          <div>
            <img src={ico3} />
          </div>
          <div>
            <img src={ico4} />
          </div>
        </section>
      </main>

      <footer></footer>
    </div>
  )
}
Copy and paste the following code in the style.css:
import "./style.css";
import bg1 from "../assets/bg-1.png";

import ico1 from "../assets/ico1.png";
import ico2 from "../assets/ico2.png";
import ico3 from "../assets/ico3.png";
import ico4 from "../assets/ico4.png";

export default function LandingPage() {
  return (
    <div className="c-wrapper">
      <nav>
        <div className="logo">
          <span> narco. </span>
        </div>
        <div className="menu-wrapper">
          <div className="menu">
            <ul>
              <li>sales</li>
              <li>favorite</li>
              <li>lookbook</li>
              <li>about</li>
            </ul>
          </div>
          <div className="action">
            <div className="cart-btn">
              <svg xmlns="http://www.w3.org/2000/svg" height="48" viewBox="0 96 960 960" width="48">
                <path d="M220 976q-24 0-42-18t-18-42V396q0-24 18-42t42-18h110v-10q0-63 43.5-106.5T480
                176q63 0 106.5 43.5T630 326v10h110q24 0 42 18t18 42v520q0 24-18 42t-42
                18H220Zm0-60h520V396H630v90q0 12.75-8.675 21.375-8.676 8.625-21.5 8.625-12.825
                0-21.325-8.625T570 486v-90H390v90q0 12.75-8.675 21.375-8.676 8.625-21.5 8.625-12.825
                0-21.325-8.625T330 486v-90H220v520Zm170-580h180v-10q0-38-26-64t-64-26q-38 0-64 26t-26
                64v10ZM220 916V396v520Z"/>
              </svg>
              <span>Cart</span>
            </div>
            <div className="account">
              <div> O </div>
            </div>
          </div>
        </div>
      </nav>

      <main>
        <section>
          <div>
            <h1>Get a perfect & luxurious looks with us</h1>
            <div className="flex action-b">
              <div>
                <div>
                  <button className="explore-btn"> Explore More </button>
                </div>
              </div>
              <h3>
                We have a lot of top collects from various top brands and experienced fashion designers around the world.
              </h3>
            </div>
          </div>
          <div>
            <div className="bg-1">
              <img src={bg1} />
            </div>
          </div>
        </section>
        <section className="ico">
          <div>
            <img src={ico1} />
          </div>
          <div>
            <img src={ico2} />
          </div>
          <div>
            <img src={ico3} />
          </div>
          <div>
            <img src={ico4} />
          </div>
        </section>
      </main>

      <footer></footer>
    </div>
  )
}
In your App.tsx file, import the landing page and replace the code with the following:
import LandingPage from './components/LandingPage';

function App() {

  return (
    <>
       <LandingPage />
    </>
  );
}

export default App;
To start the development server, run this command:
npm run devOnce you run that command, your applications starts running on a localhost:
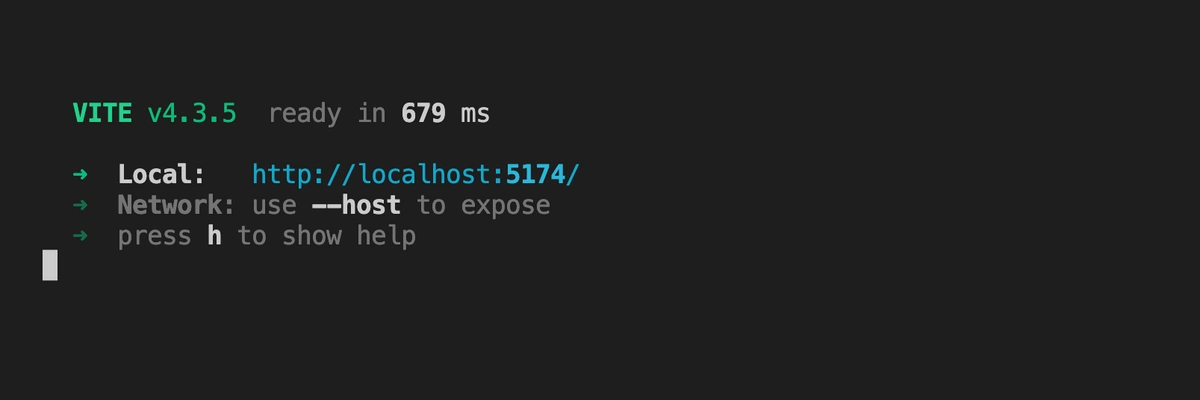
Go to that URL and the following page will be displayed on your screen:

Adding React-intl
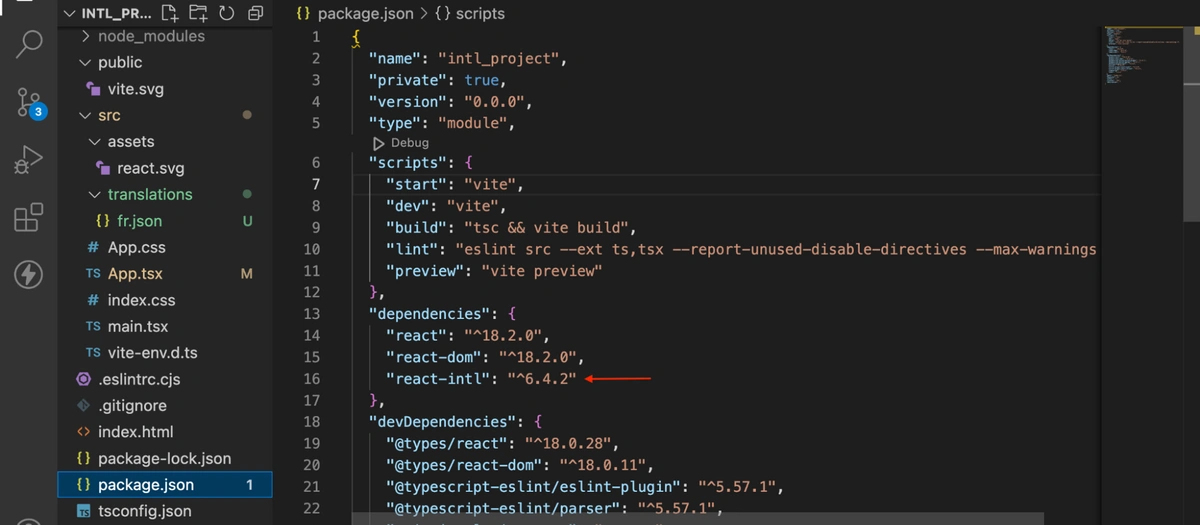
To internationalize your react application, start by installing React-intl by running the following command within your project’s root directory:
npm install react-intl
After running the command, react-intl will be successfully added to your project as a dependency as can be seen when you go to your package.json file:
Wrapping your app with IntlProvider
IntlProvider is a component provided by React-intl that enables internationalization in your application. The IntlProvider serves as a wrapper component that allows you to configure and apply internationalization to your application or specific parts of it.
You can configure a number of features at the root of your application with the IntlProvider component such as formatting date, time, numbers or rendering messages according to a specific locale.
Let's take a look at how this works:
At the top of your App.tsx file, add the following statement that imports IntlProvider from the React-intl library:
import { IntlProvider } from 'react-intl';To configure your application, you can set a number of props with the IntlProvider component at the root of your application, such as locale, formats, messages, defaultLocale, defaultFormats, timeZone, textComponent, wrapRichTextChunksInFragment, defaultRichTextElements, and so on.
Let's use the locale prop to set the language and region for your application's users to french language using "fr-FR." You can do this by simply inserting the following code into the App() component:
const locale = 'fr-FR';Next, wrap your LandingPage component with the IntlProvider:
<IntlProvider locale={locale}>
        <LandingPage />
 </IntlProvider>
This is how your complete code should look like:
import { IntlProvider } from 'react-intl';

import LandingPage from './components/LandingPage';

function App() {
  const locale = 'fr-FR';

  return (
    <>
      <IntlProvider locale={locale}>
        <LandingPage />
      </IntlProvider>
    </>
  );
}

export default App;
Translate text using FormattedMessage
FormattedMessage is another React-Intl component that provides internationalization for your applications. With FormattedMessage, you can easily format messages in your application for your users based on their locale. You can also define a default message and use the FormattedMessage component to easily translate, manage, and update the message based on the locale of the users.
FormattedMessage accepts three props:
-
id: This prop is a unique identifier for the message that the FormattedMessage component searches for to translate. -
defaultMessage: the default message serves as a fallback message that users see incase the translation fails where you can define placeholders or variables. You can also define the messages in HTML tags. -
values: The value prop allows you to create personalized messages for your users by passing dynamic values (which could be date, username or number etc) to the variables or placeholders that you set in the message content.
Let’s use the FormattedMessage component in our code example:
In your LandingPage.tsx file, import the FormattedMessage component with this statement:
import { FormattedMessage } from 'react-intl';Let’s update the following <li> elements in the code to display the menu items according to the users’ locale:
Replace this:
 <li>sales</li>
 <li>favorite</li>
 <li>lookbook</li>
 <li>about</li>
With this:
<li><FormattedMessage id="sales" defaultMessage="Sales" /></li>
<li><FormattedMessage id="favorite" defaultMessage="Favorite" /></li>
<li><FormattedMessage id="lookbook" defaultMessage="Lookbook" /></li>
<li><FormattedMessage id="about" defaultMessage="About" /></li>
Update the <span> element containing Cart to display as localized.
Replace this:
<span>Cart</span> With this:
<span><FormattedMessage id="cart" defaultMessage="Cart" /></span>Let’s update the text in the <h1> element to be localized.
Replace this:
<h1>Get a perfect & luxurious looks with us</h1>With this:
 <h1>
    <FormattedMessage id="perfectLooks" defaultMessage="Get a perfect & luxurious looks with us" />
</h1>
Update the <button> to display as localized.
Replace this:
<button className="explore-btn"> Explore More </button>With this:
<button className="explore-btn">
  <FormattedMessage id="explore" defaultMessage="Explore More" />
</button>
Update the <h3> element to be localized:
Replace this:
<h3>
     We have a lot of top collects from various top brands and experienced fashion designers around the world.
 </h3>
With this:
<h3>
     <FormattedMessage
           id="topCollections"
           defaultMessage="We have a lot of top collects from various top brands and experienced fashion designers around the world."
     />
</h3>
Add translated messages from JSON files
With React-intl, you can store translations as key-value pairs for different languages in separate JSON files, where the key serves as the message identifier and the value as the translated messages. This allows to easily manage and update the translations without altering your codebase. React-intl provides the capability of also loading the JSON files and mapping the translated messages to the right components in your application.
Let’s see how this works using the code example.
In the src directory, create a translations folder that will contain the json file called fr.json. In the fr.json file, let’s provide the necessary translations for the message IDs that were used in the components:
{
  "sales": "ventes",
  "favorite": "préférée",
  "shop": "boutique",
  "about": "à propos",
  "cart": "Chariot",
  "perfectLooks": "Obtenez un look parfait et luxueux avec nous",
  "explore": "Explorez davantage",
  "topCollections": "Nous avons de nombreuses collections de premier plan provenant de diverses grandes marques et de designers de mode expérimentés du monde entier."
}
Here you have associated the message IDs that you set in your components with their respective translations in french.
Next import the fr.json file in your React component at the top of your App.tsx file by assigning the contents of the JSON file to a variable called translatedMsg:
import translatedMsg from './translations/fr.json';Let’s pass the translations to the IntlProvider component. Add the messages prop to the IntlProvider and set it to the translatedMsg variable:
<IntlProvider locale={locale} messages={translatedMsg}>The IntlProvider will use these translations to render the French messages in your application.
Let’s confirm that the application is running and the React-intl components and JSON file are working.
Run the following command in your terminal:
npm run devGo the URL where your application is running and the contents are displayed in French:

Managing translations
React-intl allows you to handle and manage the translations in your application by providing functionalities including:
-
Extracting messages from the source code that need to be translated.
-
Creating files that store the translations.
-
Formatting the messages for the translations
-
Providing the translation messages for different languages for the users’ to be able to seamlessly switch between different languages.
-
Updating and modifying the translations as the application scales.
Closing thoughts
React-Intl is a powerful internationalization library for React developers. It enables easy implementation of features like text formatting, translation, currency handling, and date formatting based on cultural preferences. Developers can create inclusive applications that adapt to diverse languages and cultures, improving user experience and accessibility. React-Intl ensures consistent internationalization throughout the app, making it a valuable tool for building scalable multilingual apps.
To learn more about React and how you can use it with ButterCMS, check out the tutorials below!
- When & Why You Should Use React.js for Web Development
- Building a Food Ordering App with React
- Building a Portfolio Website with React and ButterCMS
ButterCMS is the #1 rated Headless CMS


Related articles
Don’t miss a single post
Get our latest articles, stay updated!
Zain is a Senior Frontend Engineer at Peekaboo Guru. He is passionate about anything and everything React, React Native, JavaScript & Mobile Machine Learning.