
by Soujanya PS
How to run a React Native app on iOS

I recently started to develop a React-Native app on iOS. This was my first foray into native app development. I was surprised by the ease and level of abstraction provided by React-Native’s command line interface. I was also curious to understand what happens under the hood when React-Native runs an app on a device or a simulator.
I spent a lot of time going through the relevant code. There was no one place which summarized what React-Native does to get the app working. Partly, that was the motivation to come up with this piece. I want to help any other person who is starting off afresh with React-Native app development.
React-Native provides command line utilities to run an app on iOS and Andriod simulators/devices. Without further ado, let's try to understand the what and how of the process to run React-Native apps on iOS.
Behind the scenes
React-native provides this neat utility called init. It creates a native app template for you. This template creates the relevant Xcode project files under the iOS folder of the app.
React-Native apps can be launched on iOS simulators/physical devices by running the following command in the root folder of an app:
react-native run-iosSuccessful execution would open the app on a simulator or a connected device. For this to happen, there are a bunch of steps which are executed when we run the above command.
run-ios command
React-Native provides a number of command line utilities to work with the app. These can be found under the local-cli folder of the React-Native node module. run-ios is one such utility which invokes the runIOS() function defined in the runIOS.js file. run-ios accepts certain options such as:
#Launch the app on a specific simulatorreact-native run-ios --simulator "iPhone 5"#Pass a non-standard location of iOS directoryreact-native run-ios --project-path "./app/ios"#Run on a connected device, e.g. Max's iPhonereact-native run-ios --device "Max\'s iPhone"#Build the app in Release modereact-native run-ios --configuration ReleaseDevice/Simulator selection
When no device is specified, run-ios would launch the app in Debug mode on a simulator by default. This is done by executing a series of xcrun simctl commands. They would first check the list of available simulators on Mac, pick one among them, and then boot the selected simulator.
Alternatively, if you wish to run the app on a physical device, plug the device to the Mac and then pass on the device details to the run-ios command.
The next step is to build the Xcode project of the app.
Building App code
Usually, the React-Native app Xcode project can be found in the iOS folder present under the root folder. The Xcode project is built using the xcodebuild command. Any options specified to run-ios such as the configuration etc. are passed on to this command.
By default, the Xcode project is built in Debug scheme. Once the project is successfully built, the app is installed and launched on the simulator or the connected device.
App code bundling in Debug Mode
During the development process, React Native loads our JavaScript code dynamically at runtime. For this, we need a server to bundle our app code and provide it as needed.
While the Xcode project is being built in Debug mode, an instance of Metro server is also started in parallel. Metro is the bundler used by apps created by the React-Native command line interface (CLI). It is used to bundle our app code in development. This helps us with faster and easier debugging by enabling hot reloading etc.
Metro server is configured to start on port 8081 by default. Once the app is launched in the simulator, a request is sent to the server for the bundle.
#Code in AppDelegate.m sends the request for the bundle: #index.bundle to serverjsCodeLocation = [[RCTBundleURLProvider sharedSettings] jsBundleURLForBundleRoot:@"index" fallbackResource:nil];RCTRootView *rootView = [[RCTRootView alloc] initWithBundleURL:jsCodeLocation moduleName:@"MobileApp initialProperties:nil launchOptions:launchOptions];The server then downloads all the required dependencies, bundles the JavaScript app code and sends it back to the app. After this step, you can see the app working on the simulator or a connected device.
App code bundling in Release Mode — Pre-packaging the JavaScript bundle
In release mode, we have to pre-package the JavaScript bundle and distribute it inside our app. Doing this requires a code change so that it knows to load the static bundle. In AppDelegate.m file, change jsCodeLocation to point to the static bundle if you’re not in debug mode.
#ifdef DEBUGjsCodeLocation = [[RCTBundleURLProvider sharedSettings] jsBundleURLForBundleRoot:@"index" fallbackResource:nil];#elsejsCodeLocation = [[NSBundle mainBundle] URLForResource:@"main" withExtension:@"jsbundle"];#endifThis will now reference the main.bundle resource file. This file is created during the Bundle React Native code and images build Phase in Xcode. During this phase, react-native-xcode.sh script is run which bundles the JavaScript app code. This script can be found under the React-Native node module’s scripts folder.
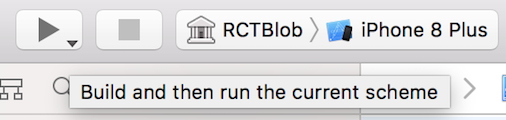
Building the app from Xcode
Alternatively, the Xcode project can also be built within Xcode in Mac instead of using the React-Native CLI. Once done, the app can be launched on a simulator selected from the Xcode options or on a connected physical device.
I hope this helped you understand the various steps which happen when we run a simple react-native run-ios command which magically brings up an app on iOS.
Some parts of the information provided here have been sourced from the React-Native home page. The rest is a product of me snooping around the code :)