by Pavel Vlasov

How to build a GitHub bot with PhantomJS, React, and Serverless framework
This tutorial is about building a simple Serverless bot that returns a chart with top GitHub repository contributors for a selected period. It is relevant to those who have some experience with React, JavaScript, TypeScript, Node.js, Amazon Web Services (AWS), and the Serverless framework.
You can check out the code on Github.
Services and tools we’ll be using
Before jumping into coding, let’s do a quick overview of AWS services and tools that we’ll be using.
To retrieve top repository contributors, we will use GitHub stats API, the amazing Nivo to display data, Storybook to check how our chart looks and feels, PhantomJS to turn HTML into an image, and Serverless framework to interact with AWS.
Let’s get started
I’ll be using TypeScript. If you prefer ES6, you will need to configure Babel.
First, you have to create tsconfig.json in the root of your repository. Options to pay attention to include:
"module": "commonjs","target": "es5","lib": ["es6", "esnext.asynciterable"],"moduleResolution": "node","jsx": "react"Then, we’ll create a simple API to query stats from GitHub. You can follow the file structure from the GitHub repo or use your own. For example:
To access the GitHub API, you’ll have to create a personal access token.
This module simply sends the request with the provided token and retrieves the data.
Displaying the charts
To display the data, we’ll use Nivo and Storybook. A simple component may look like this:
First, setup Storybooks by running the following command in the root folder:
npm i -g @storybook/cligetstorybookCopy the .storybook folder into the root repository and replace all existing files. It contains the Webpack and Storybook configuration. Create a stories folder and put in a sample story for your component:
Run npm run storybook and open localhost in the browser. You should see the following result:
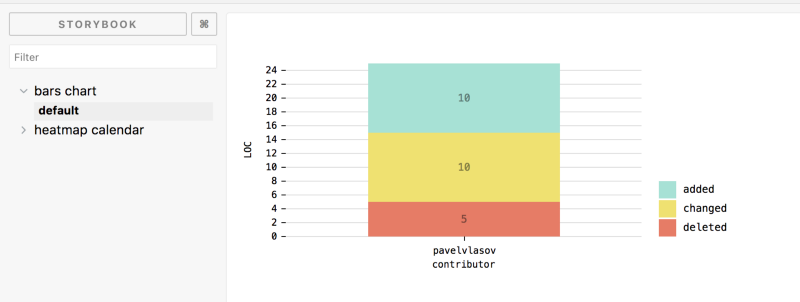
Try to play with the options and test data. Storybook will change the look immediately.
Turning HTML into PNG
Usually, chat systems like Facebook Messenger and Slack do not allow users to insert HTML cards in the dialog, so the next step will be to build a helper that renders HTML into a PNG image.
Using a simple script with jsdom library, we can mimic browser behavior and serialize HTML, like this:
createDomForChart returns a new instance of jsdom, and the chart function simply calls dom.serialize() when component rendering is done.
With PhantomJS, we can turn markup into an image using this simple script:
We’re passing screenshot.js into the phantomjs executable path — along with an HTML string, width and height — and getting back buffer with the rendered image.
You may notice that I’ve been using two PhantomJS binaries (for OS X and Linux). We’ll need the Linux version further in an AWS environment. You can download them from PhantomJS.org or use files from the repository.
Tying everything up
Now, let’s create lambda to handle requests. I recommend putting PNG rendering logic into a separate service. Because PhantomJS binary is approximately 50 mb in size, it slows down deployment if you change anything in the API. Also, you can reuse this lambda for other purposes.
We’ll start by creating webpack.config.ts (to bundle source code) and serverless.base.js (to define the base serverless configuration) in the root folder.
If you want to know more about use cases of serverless JavaScript configurations, you can read about it in my previous article.
You’ll have to change deployment and image bucket names, like this:
deploymentBucket: { name: 'com.github-stats....deploys'},environment: { BUCKET: 'com.github-stats....images', GITHUB_TOKEN: '${env:GITHUB_TOKEN}', SLACK_TOKEN: '${env:SLACK_TOKEN}, STAGE: '${self:provider.stage}'},This is because the name of the bucket has to be globally unique.
Turning HTML to PNG service
First of all, we’ll create a handler that will return a URL of the generated image. The handler should validate and process the request body:
…and if everything is ok, it should generate the image and put it into an S3 bucket.
Let’s create webpack.config.ts to bundle source files. We’ll use the copy-webpack-plugin and webpack-permissions-plugin to include PhantomJS binaries into a bundle — and give permissions for execution. This will require us to run the deploy command with sudo since Webpack doesn’t have permissions to modify file system rights by default.
The last step will be using the serverless.js file to tie our handler with an API Gateway event.
Now, we need to perform the same steps for stats handler, but we don’t have to make any changes to webpack.config.ts.
The only difference is an additional permission to invoke lambda:
iamRoleStatements: [ ...baseConfig.provider.iamRoleStatements,{ Effect: 'Allow', Action: ['lambda:InvokeFunction'], Resource: ['*']}]Setting up the Slack bot
The last step will be to create a service that will handle message events for the bot. To keep it simple, we’ll handle only mention events. Let’s set up the basic event handler.
We have to handle a verification event from Slack and respond with 200 status and challenge parameters:
callback(null, { body: JSON.stringify({ challenge: (slackEvent as VerificationEvent).challenge }), statusCode: 200});To properly handle a Slack event, the endpoint has to reply within 3000 milliseconds (3 seconds), so we’ll have to immediately respond and asynchronously send a follow-up message using postMessage API.
In the code above, we parsed the message text to extract a repository name and called out an image stats lambda to retrieve an image URL and send a message back to Slack. You can find the full code of the handler here.
Code for serverless.js and Webpack configurations would be similar to the stats service, so if you have problems with setting it up, take a look at the full source code.
Creating a Slack app
Now let’s create a new Slack app. Go to the Slack API, create a new account (if you have not already done so), create a new app, and add the bot scope in the scopes section.
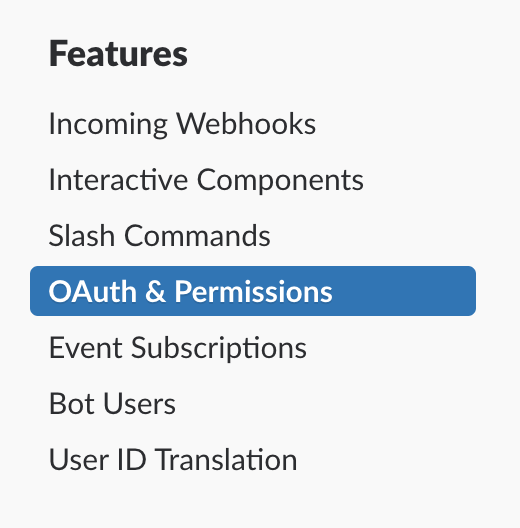
Go to the “OAuth & Permissions” section in the sidebar.
Add the bot user scope.

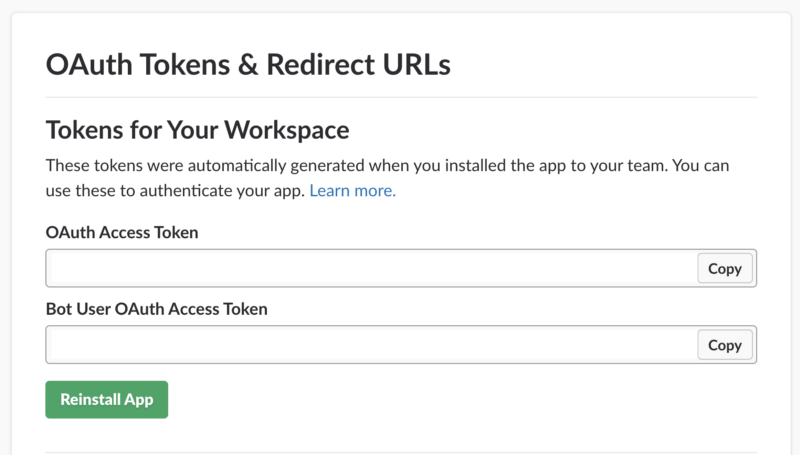
Then, you’ll be able to install the app to your organization and get access to tokens.
Deploying the services
You’ll have to install a serverless framework version greater than 1.26 because earlier versions do not support JavaScript configuration files. And I recommend installing slx to simplify the deployment of multiple services.
npm install -g serverlessnpm install -g servicelessCopy the GitHub and Slack bot tokens, and set them to GITHUB_TOKEN and SLACK_TOKEN environment variables accordingly. Run the following command in the terminal:
sudo GITHUB_TOKEN=<your token> SLACK_TOKEN=<your slack token> slx deploy allAs mentioned above, we need sudo to set execute permissions to PhantomJS binaries.
Be patient! Deployment may take a while. At the end you should see a similar output:
Deployment completed successfuly[app/html-to-png] [completed]:Service Informationservice: html-to-pngstage: devregion: us-east-1stack: html-to-png-devapi keys: Noneendpoints: Nonefunctions: renderToPng: html-to-png-dev-renderToPngServerless: Removing old service versions...[app/slack] [completed]:Service Informationservice: git-stats-slackstage: devregion: us-east-1stack: git-stats-slack-devapi keys: Noneendpoints: POST - https://xxxxxxx.execute-api.us-east-1.amazonaws.com/dev/stats/slack/event-handlerfunctions: eventHandler: git-stats-slack-dev-eventHandlerServerless: Removing old service versions...[app/stats] [completed]:Service Informationservice: git-statsstage: devregion: us-east-1stack: git-stats-devapi keys: Noneendpoints: GET - https://xxxxxx.execute-api.us-east-1.amazonaws.com/dev/stats/contributors/{owner}/{repo}functions: getContributorStatsImage: git-stats-dev-getContributorStatsImageServerless: Removing old service versions...The last step will be to subscribe our endpoint to bot mention events.
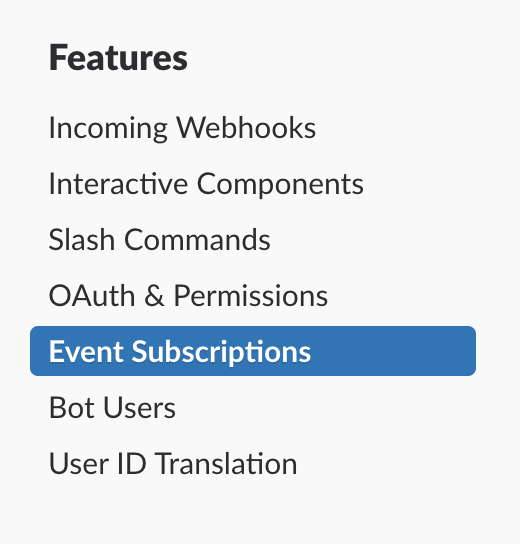
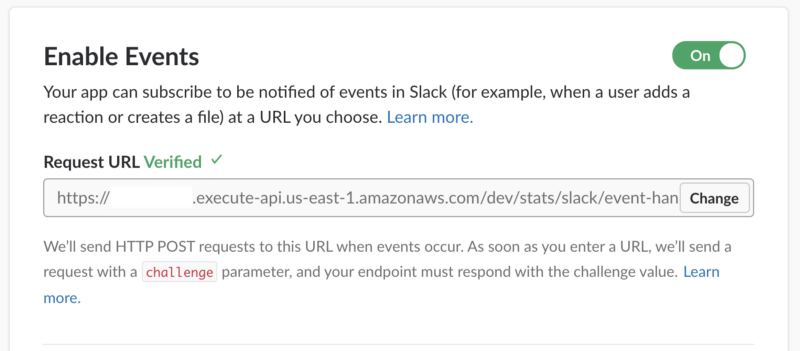
Select the “Event Subscription” section in the Slack API navigation.
Then paste the event handler URL that you can find in the deploy command output.
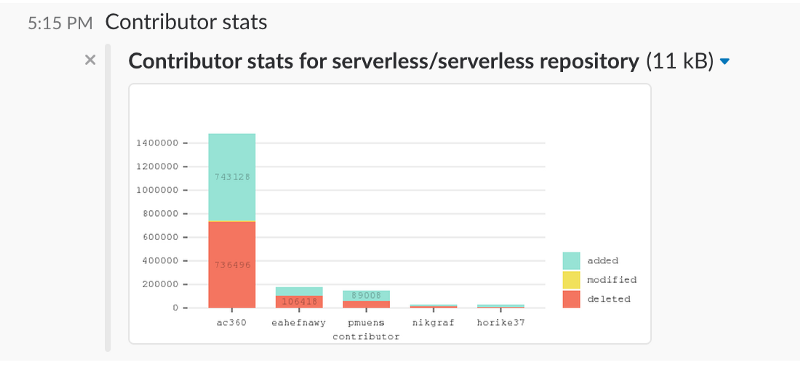
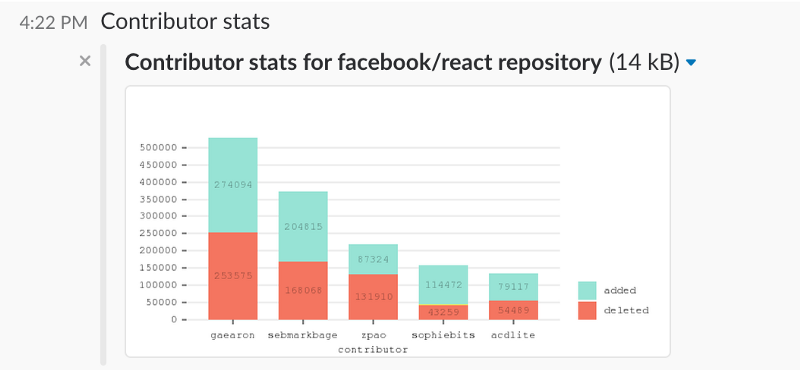
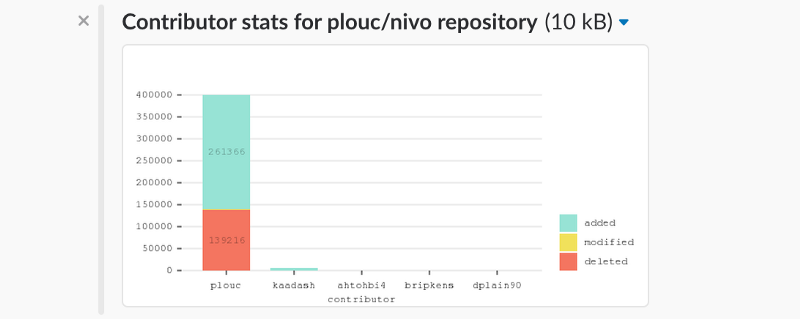
Time to play around a bit! Here are some examples of rendered images:
That’s it!
I hope you found this article helpful. I’d love to see in the comments other types of stats you would like to see in the service.
Please clap if you enjoyed the article! And if you’d like to chat or connect, you can find me on Twitter, GitHub and Linkedin.