- Knowledge base fundamentals
- Understanding React Native
- Why you should power your knowledge base with ButterCMS
- Tutorial: Building a knowledge base with React Native & ButterCMS
- Creating page types and components with ButterCMS
- Populating created page types with content
- Creating the React Native frontend
- Configuring the search function
- UI and search feature results
- Closing thoughts
GSD
Creating a Knowledge Base with React Native and ButterCMS
Posted by Levis Masonde on September 22, 2023
Nowadays, when you want to learn about how a product works or have any issues you want to resolve, you can just search online or “google it”. Seems simple, right? The internet is a vast space full of information, after all. But that being said, not all its information is correct and reliable.
So, where should you go if you want reliable information about a specific product or service? You might say YouTube or Google or some other search engine, and while you are not wrong, such sites are extremely broad, public, and might not have the most reliable information available.
To make things easier for your customer base (and even internal teams), your business should store and provide readily available and accessible information on core products and services. And while this may seem like a lot of work, all this can be accomplished by using a knowledge base which acts as a central location for all common questions, troubleshooting, how-to guides, and even employee training.
In this tutorial, you will learn how to build a custom knowledge base using React Native and ButterCMS.
Table of contents
Knowledge base fundamentals
A knowledge base is a self-serve online library of information about a product, service, department, or topic. A knowledge base is an important part of an organization’s knowledge management. The degree of simplicity this library requires cannot be overstated. As you can imagine, having a big library of information without a good navigation system can be disastrous.
As a business owner, a knowledge base can add the following advantages:
-
One-stop-shop for information: Your customers or employees can access crucial information regarding your products or services all from one place.
-
Easy updates: You can easily update the content across all applications without having to update multiple different data sources.
-
Time-saving: Having frequently asked questions or manuals available for customers can save the customer and the company's time. You can also save time by publishing documents for new employees for training.
-
Reduced overloads: Having a knowledge base can reduce the number of queries that customer service team members receive by handling frequently asked questions and common tutorials. Not only will this reduce situations in which they are overwhelmed with incoming support tickets, but it will also free up their time so that they can focus on more complex issues.

Types of knowledge bases
A knowledge base can be used to contain internal data and external data. Internal knowledge bases usually cover information catered for a company’s employees, such as:
-
Task guides
-
Form templates
-
Company policies
-
New employee onboarding resources
An external knowledge base is made for customers and covers everything a customer might want to know about your product or service, such as:
-
Frequently asked questions
-
Installation instructions
-
Product manuals
-
Tutorials
Understanding React Native
React Native is ReactJS’ offspring programming language made to develop cross-platform apps. The open-source UI framework was created by Meta. The syntax is similar to ReactJS, except React Native replaces the traditional user interface programming styles tied to HTML with a fresh user interface style made possible by its core components.
In mobile development, native components for Android and iOS are used to render UI elements. At runtime, React Native creates the corresponding Android and iOS views for those components, so your app will adapt the same feel as the native applications.
React Native has the Hot Reloading feature, which means you can re-render your entire code every time you save your project or by clicking on the refresh button on your smartphone device. From a developer’s point of view, this makes a world of difference when coding by keeping the tempo high and enabling you to have a real-time debugging system since you will know exactly what you just did for the code to throw an error or do something unexpected.
Accessing the internet through your mobile phone is easy and mobile phones are portable, no wonder more and more people are turning to apps to access the internet and their information.
Having a knowledge base in a mobile phone app is a great idea since your customers or colleagues can access the information they need from anywhere and at any time.
React Native creates apps with the capability to work offline, as well. Therefore, your customers or employees do not need to be connected to the internet to retrieve information.
Why you should power your knowledge base with ButterCMS
ButterCMS is a headless content management system (CMS), which is a content repository system that allows control of website content. It has no attached presentation layer—giving you the ability to display data on any front end of your choice. For a deeper understanding, refer to the article What is Headless CMS. A headless CMS also provides flexibility by enabling you to use different front-end frameworks and programs.
ButterCMS handles all the backend of your application while you get to work on the front end. It also has a dashboard portal for users and admins. This helps separate the publisher and the developer environments.
For this tutorial, we will employ page types to structure your web pages, which will be used to create the kb_article_page_type and kb_homepage_page_type. We will also use reference fields to quickly link the different pages together. Lastly, we will utilize the components feature to create custom reusable sections for our pages, as well.
Tutorial: Building a knowledge base with React Native & ButterCMS
For this tutorial, let's say you are an aspiring entrepreneur and just started a small business selling network routers and you want to use ButterCMS to create your own knowledge base. Now, let's dive in.
Tutorial prerequisites
-
Node.js (version 16.17.1, includes npm 8.15.0)
-
Visual Studio Code (version 1.72)
-
Smartphone emulator/smartphone with Expo GO installed
-
ButterCMS account. There is a 30-day free trial.
Creating page types and components with ButterCMS
You will be creating a knowledge base and an articles page using ButterCMS’s page types feature.
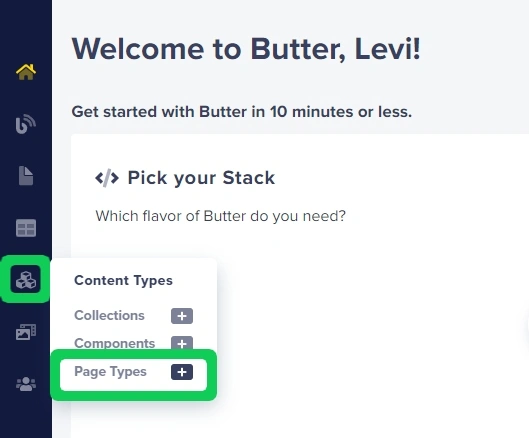
First, log in to your ButterCMS account and hover over the Content Types icon and click on Page Types.
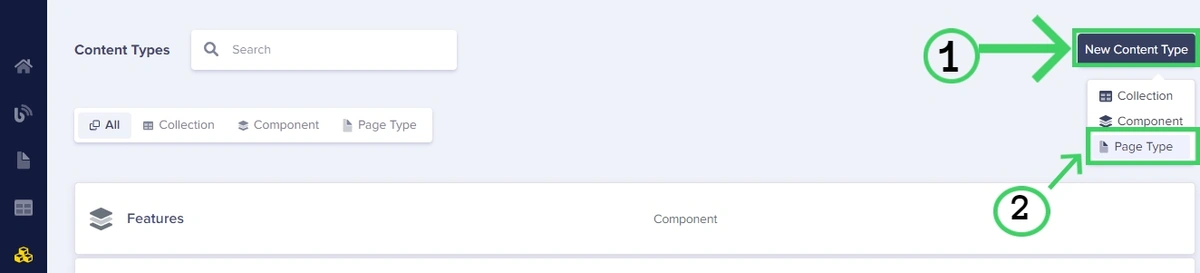
Once at the Page Types page, click on New Content Type from the dropdown and select Page Type. This will lead you to the Page Type page. The button will lead you to a page where you will be able to configure your page types. You will utilize the different field types on the left pane of the page to configure your pages.
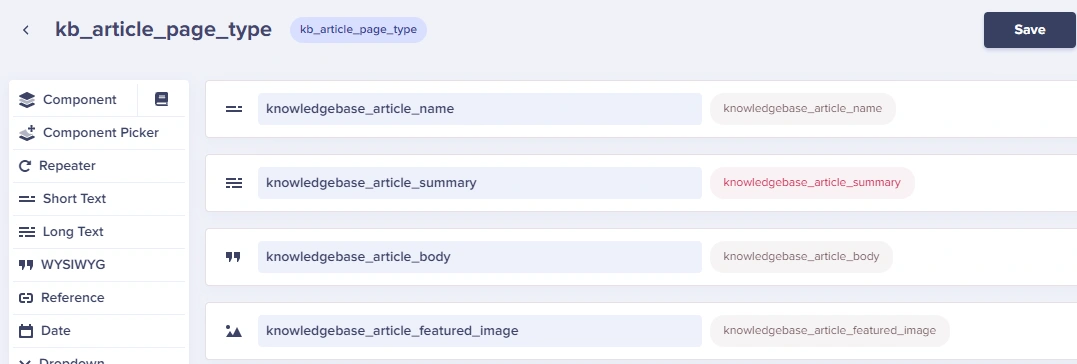
Configuring our knowledge base article page type
We will begin with configuring our knowledge base article page type, which we will eventually name kb_article_page_type.

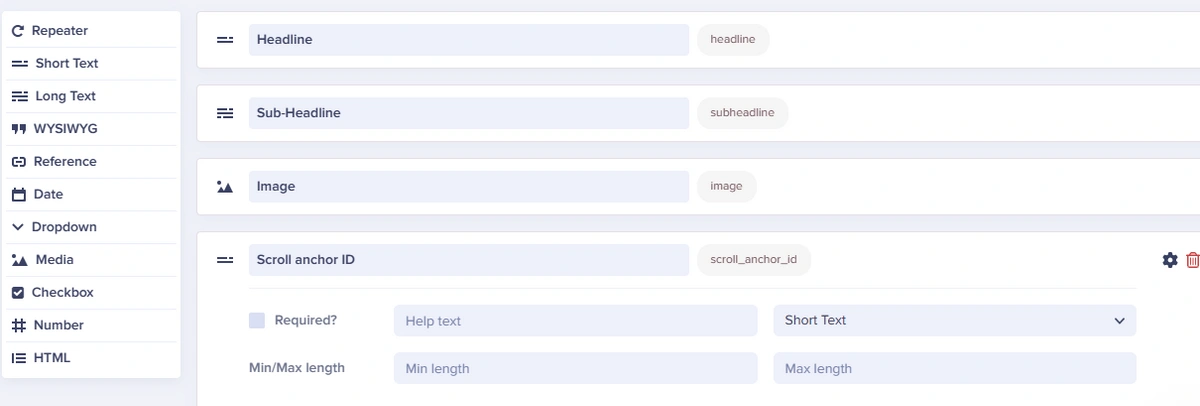
You can hover over a content field to get more information about it, as seen in the image above.
For the kb_article_page_type, you will use the following fields:
-
Short text:
knowledge_article_name -
Long text:
knowledge_article_summary -
WYSIWYG (What you see is what you get):
knowledge_article_body -
Media:
knowledge_article_featured_image
This is how your fields will look on your ButterCMS portal. Click on the Save button and save the page type as kb_article_page_type.
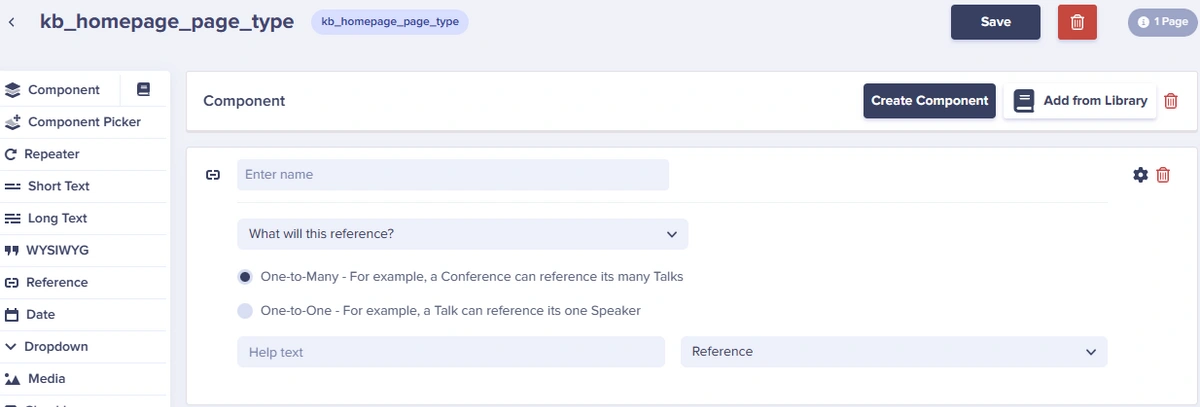
Once the kb_page_type page type is saved, create another page type named kb_homepage_page_type following steps similar to those shown above. Use the following fields:
-
Component:
hero(Please note that the Hero component will be created later on.) -
Reference:
knowledgebase_article_section
Your kb_homepage_page_type should look like this:
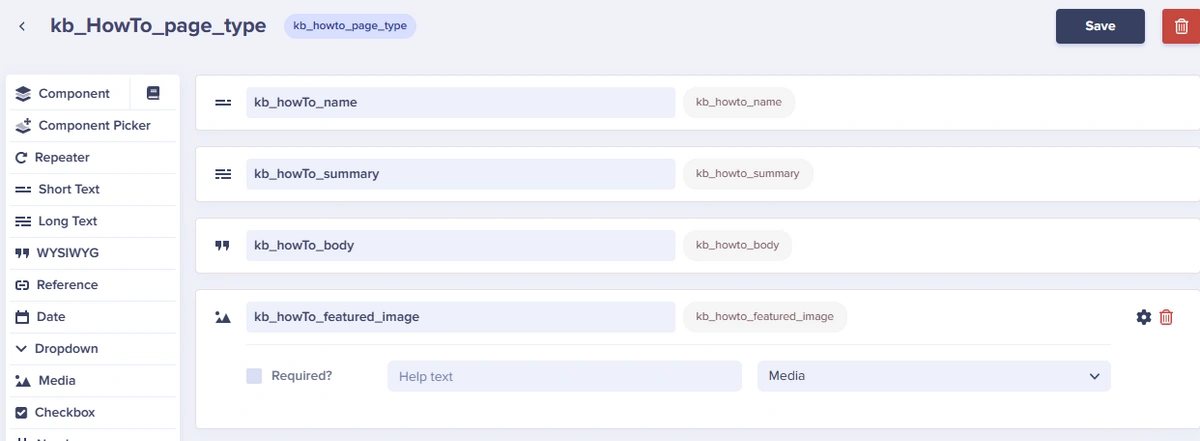
Then, create the last page type named kb_HowTo_page_type to host “How To” content following steps similar to those shown above. Use the following fields:
-
Short Text:
kb_howTo_name -
Long Text:
kb_howTo_summary -
WYSIWYG (What you see is what you get):
kb_howTo_body -
Media:
kb_howTo_featured_image
Once you are done adding your fields, click on the Save button and save the Page Type as Kb_HowTo_page_type.
Once you are done with creating the page types Kb_HowTo_page_type for “How To” guides, you can create another page type to reference all the individual How To guides. Add the following fields to your knowledgebase_howTo page type:
-
Reference:
related_howToArticles
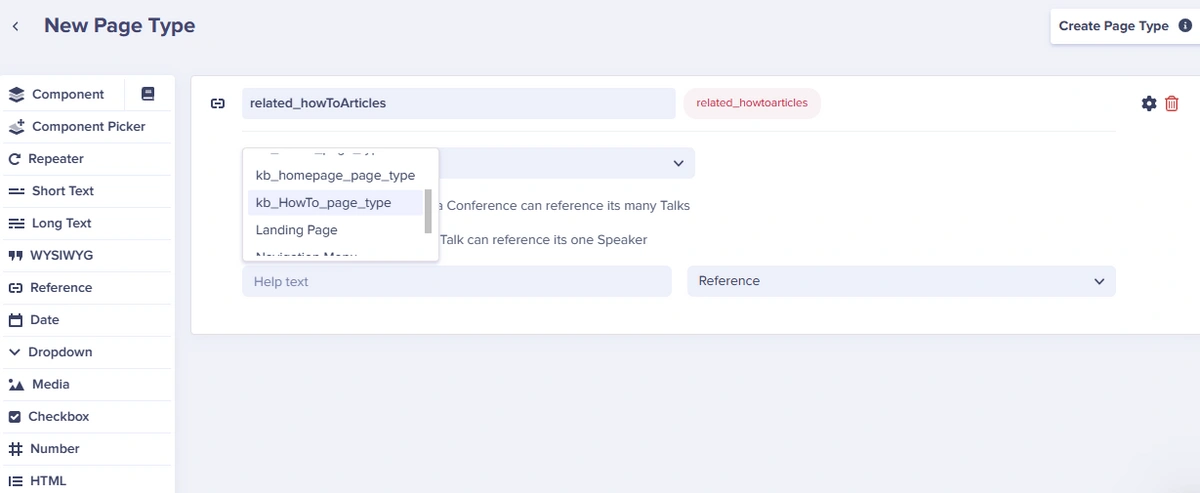
After creating the reference field, link the reference to the kb_HowTo_page_type created previously.
You will get to upload content to these page types later on in the tutorial.
Creating a Hero component
This section will show you how to create a component in ButterCMS. After storing this component in the library, you will be able to import it into any section of a page type.
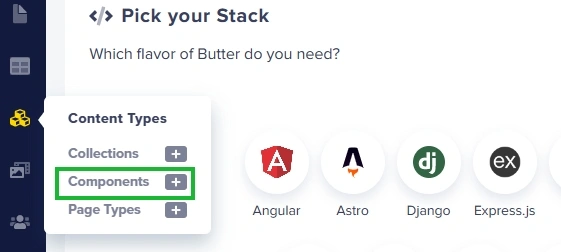
From the home page, hover over the Content Types icon and select Components.
On the Content Types page, hover over the New Content Type button and select Component.

Once on the Components page, add the following fields to your component:
-
Short text:
Headline -
Long text:
Sub-headline -
Media:
Image -
Short text:
Scroll anchor ID
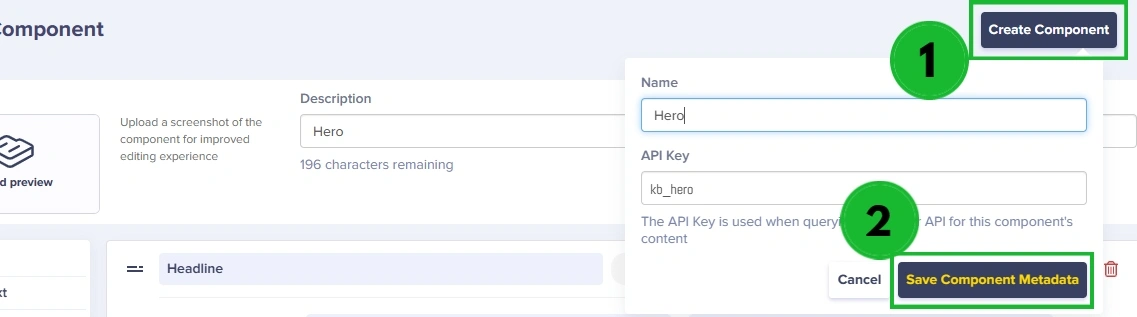
After adding the fields, click on the Create Component button, name your component Hero and name your API Key kb_hero. Click the Save Component Metadata button to save your component.
Great, now you will be able to use this component when creating page types.
Configure the knowledge base home page
As mentioned in the previous section, you will use the Hero component made in the previous section as the first section of your home page.
Go back to the home page. Hover over the Content Types icon and select Page Types.
Once on the Page Types page, select the kb_homepage_page_type page type to start configuring it.

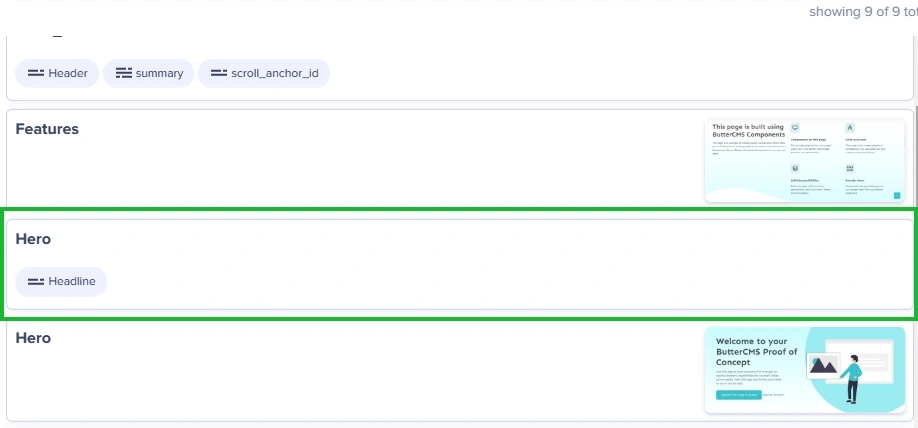
Click on the Component as a field and then click on the Add from Library option.

After the prompt, select the Hero component.
After adding the Hero component, add a reference field for the article section as shown below.
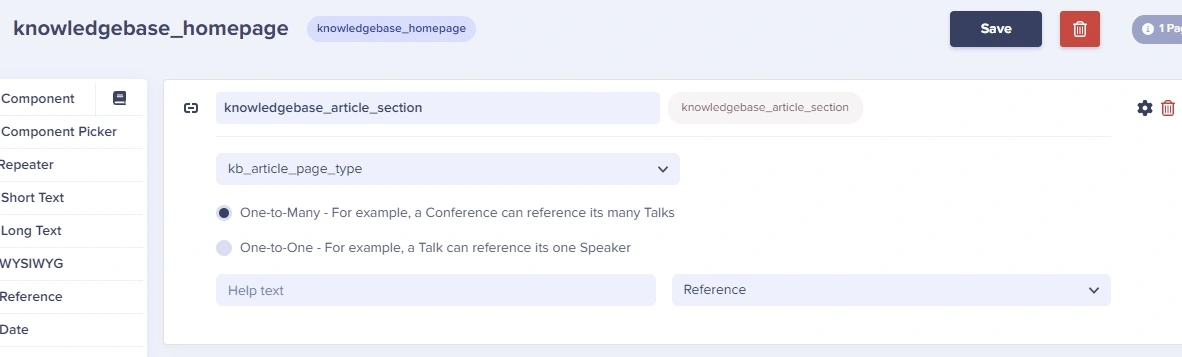
Populating created page types with content
Now that you have configured your Kb_homepage_page_type and Kb_article_page_type page types, you can easily add content to your pages now.
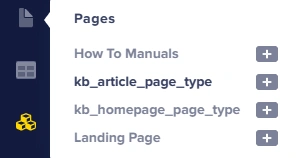
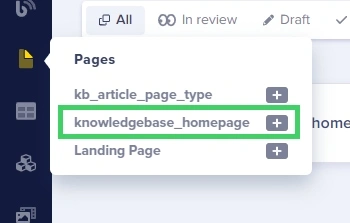
Go to the main navigation pane, hover over the Pages icon, and click on Kb_article_page_type to start adding content to the page type.
When on the Pages page, hover over New Page and select Kb_article_page_type.

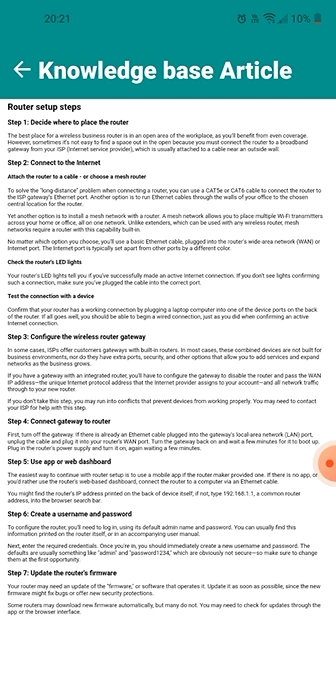
Now, add the content to your page. After naming it, click the Publish button to publish your page content.
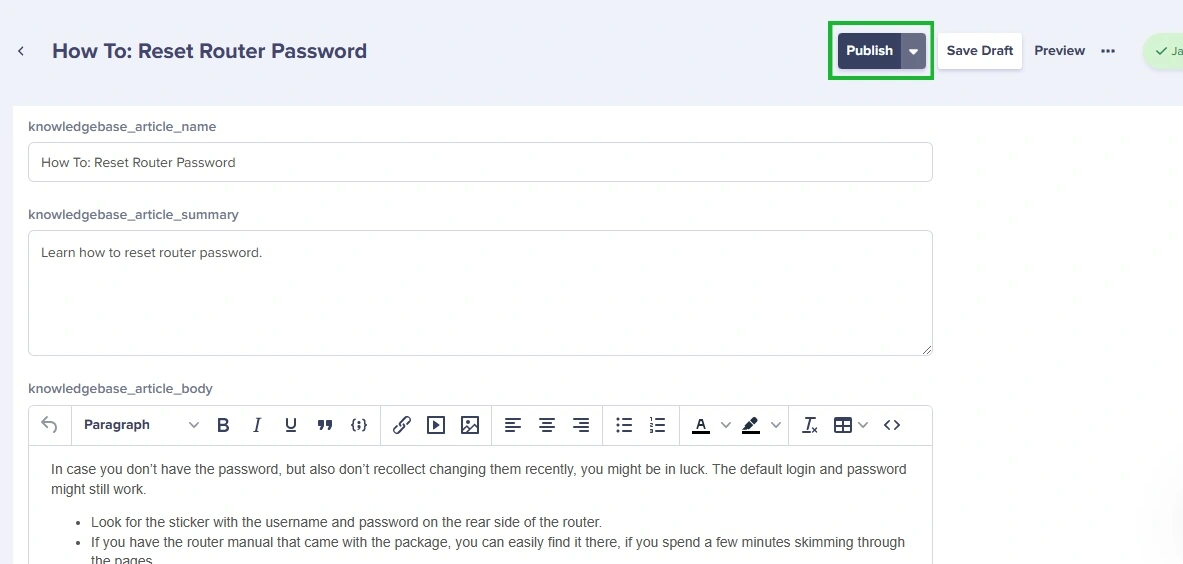
Repeat the steps and create more Kb_article_page_type pages with different content as shown in the examples below:
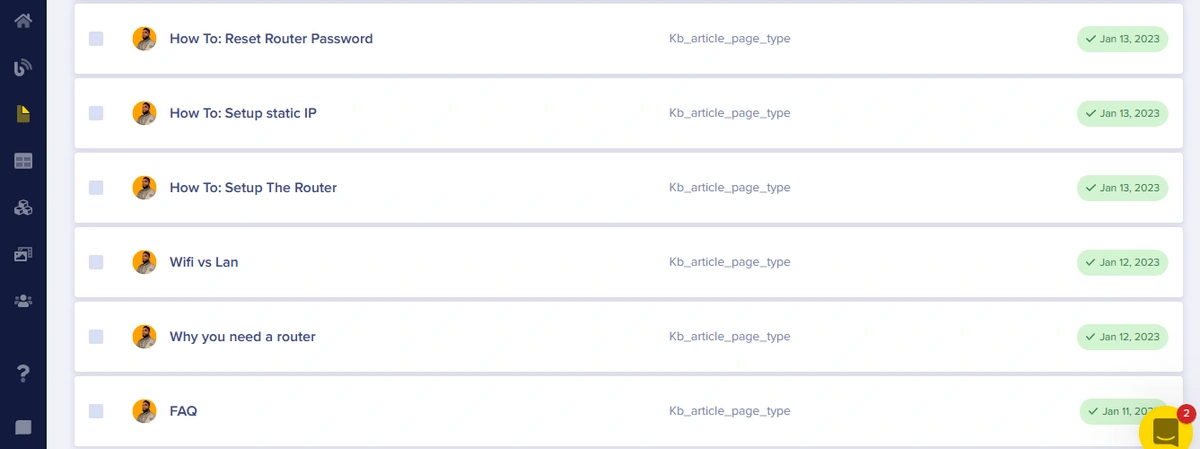
These pages will be added as a reference on the knowledgebase_homepage page. Now, go to the main navigation pane. Hover over the Pages icon and click on knowledgebase_homepage to start adding content to the page type.
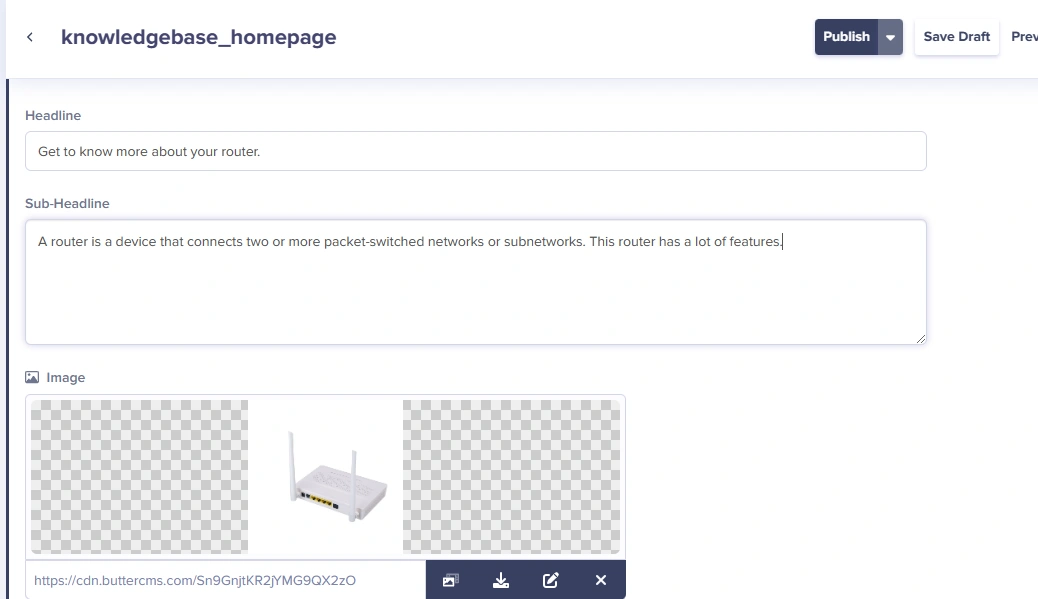
Once on the page, add your content on the created page type. The first section is the Hero component. Add content to the Hero section as shown below.
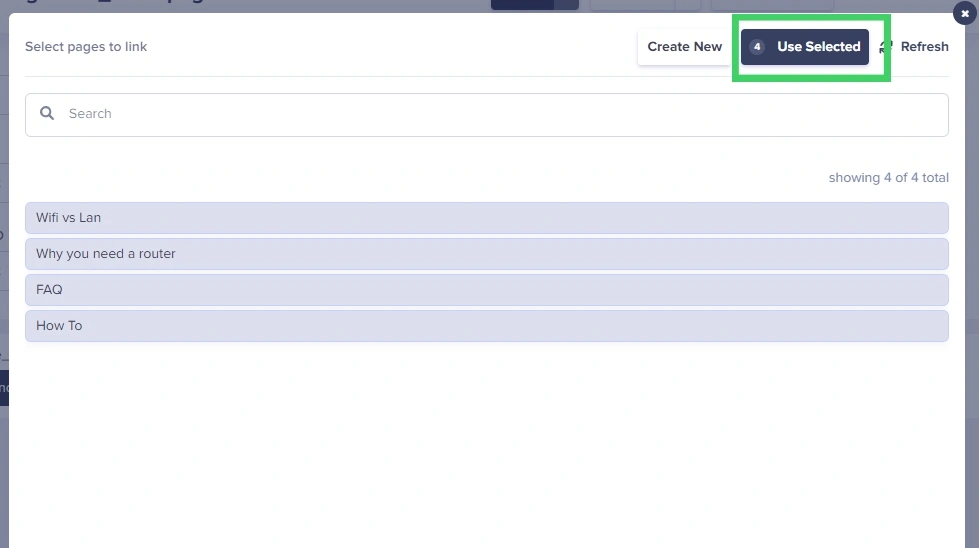
After adding content to the Hero section, you can add content to the second section, which is the Knowledgebase_article_section.

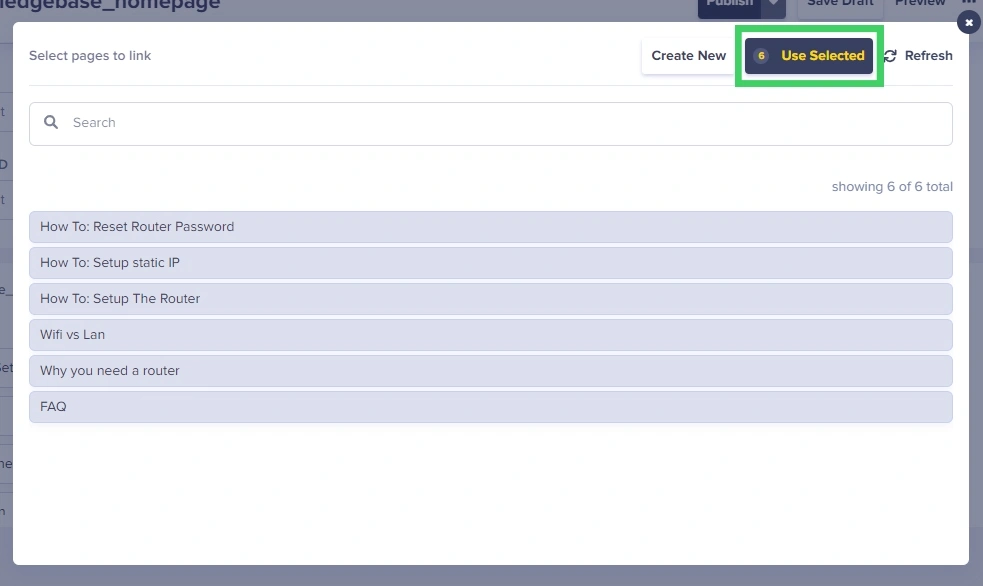
Your articles should show as shown below. After selecting the related articles, click the Use Selected button to complete the reference.
When more pages are added to the referenced page type, you need to come back to this page to add the new pages as links, this way, not every page posted will automatically be added to the application and you get to quality control as shown below.
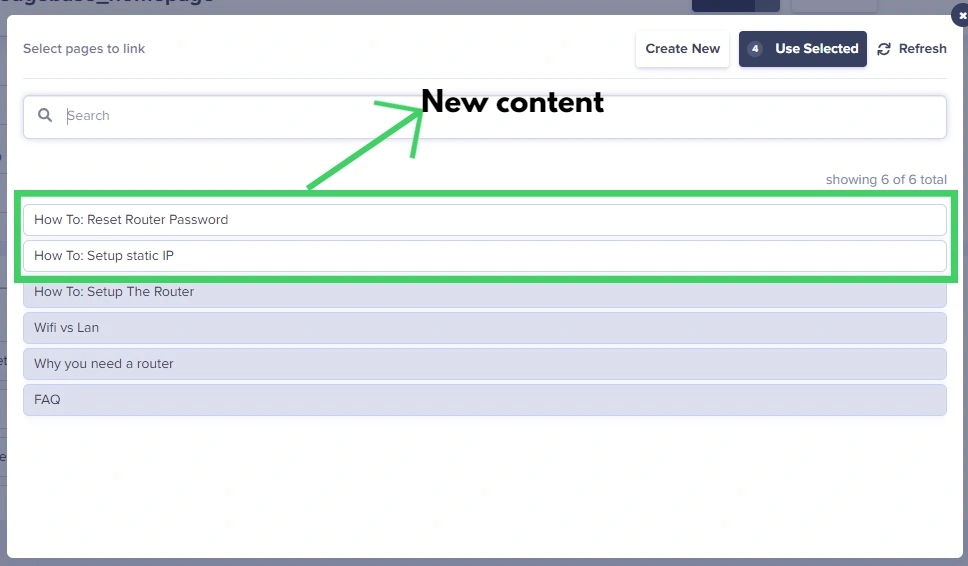
Select the new content and click on Use Selected and publish the page again.
Creating the React Native frontend
You will be using React Native to create the user interface for your application. You will have a home screen and a screen to showcase the entire article.
Unless you already have an existing React Native app you would like to work on, you can create a new React Native app following the steps described below.
Open Visual Studio Code and press CTRL + SHIFT + ` to open a new terminal window. Then, use the npx command npx create-expo-app <your app name> to create an Expo React Native app.
Adding ButterCMS to the project
After creating your React Native application or accessing a pre-existing application, for ButterCMS to work with your application, you need to provide a ButterCMS client which will act as an authorization key and also a serializer for your requests.
To install the ButterCMS client in your project, first make sure you run the cd command cd <your project name> and then use the npm command npm install buttercms –save to load the ButterCMS module to your project

To authenticate your requests, you need to provide your ButterCMS client with your API key. Create a file called ButterCMS_Client.js and add the code as shown below to define your ButterCMS client.
//ButterCMS_Client.js
import Butter from 'buttercms'

const butter = Butter('<your key>')

export default butter
You will use this file for authentication when making your API requests, so keep it safe.
Creating screens for each page
In this section, you will create two pages: one to view a list of available blogs and another to show the selected blog post’s contents.
Use the mkdir command mkdir screens to create a folder called screens in your React Native project.
Use the npm command npm install @react-navigation/native @react-navigation/native-stack to add the modules to your project.
Under the screens folder, create a file named kb_home.js which will be set to be the default screen.
//kb_home.js
import { StyleSheet, Text, View, FlatList,ScrollView, Image } from 'react-native';
import React, { useState, useEffect } from 'react';
import butter from '../ButterCMS_Client';
import Article_cards from '../components/article_cards';
import { SearchBar } from '@rneui/themed';


const Kb_home = ({navigation}) => {
    const [pageData, setPageData] = useState([]);
    params = {
        'preview': 1
    }
    const Page = async () => {
        butter.page.retrieve('*', 'knowledgebase_homepage', params)
        .then(function(resp) {
            setPageData(resp.data.data.fields);
           console.log('main console:',pageData.knowledgebase_article_section)
        })
      };
    useEffect(() => {
       Page();
      }, []);
  return (
    <ScrollView>
      <View style={styles.heroStyle}>
        <Text style={styles.heroHeadline}>{pageData.hero.headline}</Text>
        <Image source={{uri: pageData.hero.image}} style={{width: 100, height: 100}}/>
      </View>
      <FlatList

           data={pageData.knowledgebase_article_section}
           renderItem={({ item }) => <Article_cards article_card_data={item} navigation={navigation}/>}
           keyExtractor={(item, index) => index.toString()}
           showsVerticalScrollIndicator={false}

           />


    </ScrollView>
  )
}


export default Kb_home


const styles = StyleSheet.create({
  heroImage:{
    width:50,
    height:50
  },
  heroStyle:{
    height:120,
    backgroundColor:'white',
    display:'flex',
    flexDirection:'column',
    flexWrap:'wrap'
  },
  heroHeadline:{
    width:130,
    padding:10,
    fontWeight:'bold'
  }
})
After creating the script for the home page, you can now create a screen for related articles named kb_articles.js and add the code shown below.
import { StyleSheet, Text, View, FlatList,ScrollView, Image } from 'react-native';
import React, { useState, useEffect } from 'react';
import butter from '../ButterCMS_Client';
import Article_cards from '../components/article_cards';
import { SearchBar } from '@rneui/themed';
import Categories from '../components/categories';


const Kb_featured_articles = ({navigation}) => {
    const [pageData, setPageData] = useState([]);
    const [filteredPageData, setFilteredPageData] = useState([]);
    const [search, setSearch] = useState([]);
    const [articlesData, setArticlesData] = useState([]);
    const [featuredArticlesData, setFeaturedArticlesData] = useState([]);


    params = {
        'preview': 1
    }
    const Page = async () => {
        butter.page.retrieve('*', 'knowledgebase_homepage', params)
        .then(function(resp) {
            setPageData(resp.data.data.fields);

            setArticlesData(resp.data.data.fields.knowledgebase_article_section)
        })
      };
    const ArticlesFilter = async () => {
        const newArticleData = articlesData.filter((item) => {
            const htData = item.fields.knowledgebase_article_name ? item.fields.knowledgebase_article_name.toUpperCase() : ''.toUpperCase();
            const categoryType = 'HOW TO'
            return !htData.includes(categoryType);
        }


        );
        setFeaturedArticlesData(newArticleData);
        setFilteredPageData(newArticleData);
    }
    const searchFilter = (text) => {
      if (text) {
          const newData = featuredArticlesData.filter((item) => {
          const itemData = item.fields.knowledgebase_article_name ? item.fields.knowledgebase_article_name.toUpperCase() : ''.toUpperCase();
          const textData = text.toUpperCase();
          console.log('item data:',itemData);
          console.log('text data:',textData)
          return itemData.includes(textData);
        });
        setFilteredPageData(newData);
        console.log('filtered data',filteredPageData)
        setSearch(text);
      }
      else {
        console.log('elsed')
        setFilteredPageData(articlesData);
        setSearch(text)
      }
    }

    useEffect(() => {

       Page();
       ArticlesFilter();

      }, []);
  return (
    <View>


     <SearchBar
     placeholder="Search the for articles"
     onChangeText={(text) => searchFilter(text)}
     value={search}
     />

      <FlatList

           data={filteredPageData}
           renderItem={({ item }) => <Article_cards article_card_data={item} navigation={navigation}/>}
           keyExtractor={(item, index) => index.toString()}
           showsVerticalScrollIndicator={false}

           />


    </View>
  )
}


export default Kb_featured_articles


const styles = StyleSheet.create({
  heroImage:{
    width:50,
    height:50
  },
  heroStyle:{
    height:120,
    backgroundColor:'white',
    display:'flex',
    flexDirection:'column',
    flexWrap:'wrap'
  },
  heroHeadline:{
    width:130,
    padding:10,
    fontWeight:'bold'
  }
})
Now, create another file and name it kb_howtos.js and add the code shown below.
import { StyleSheet, Text, View, FlatList,ScrollView, Image } from 'react-native';
import React, { useState, useEffect } from 'react';
import butter from '../ButterCMS_Client';
import Article_cards from '../components/article_cards';
import { SearchBar } from '@rneui/themed';


const Kb_howto = ({navigation}) => {
    const [pageData, setPageData] = useState([]);
    const [filteredPageData, setFilteredPageData] = useState([]);
    const [search, setSearch] = useState([]);
    const [articlesData, setArticlesData] = useState([]);
    const [howToData, setHowToData] = useState([]);


    params = {
        'preview': 1
    }
    const Page = async () => {
        butter.page.retrieve('*', 'knowledgebase_homepage', params)
        .then(function(resp) {
            setPageData(resp.data.data.fields);

            setArticlesData(resp.data.data.fields.knowledgebase_article_section)
        })
      };


    const HowToFilter = async() => {
        const newHowToData = articlesData.filter((item) => {
            const htData = item.fields.knowledgebase_article_name ? item.fields.knowledgebase_article_name.toUpperCase() : ''.toUpperCase();
            const categoryType = "HOW";
            return htData.includes(categoryType);
        } );
        setHowToData(newHowToData);
        setFilteredPageData(newHowToData);
        console.log('How to filtered data:',filteredPageData)
    };


    const searchFilter = (text) => {
      if (text) {
          const newData = howToData.filter((item) => {
          const itemData = item.fields.knowledgebase_article_name ? item.fields.knowledgebase_article_name.toUpperCase() : ''.toUpperCase();
          const textData = text.toUpperCase();
          console.log('item data:',itemData);
          console.log('text data:',textData)
          return itemData.includes(textData);
        });
        setFilteredPageData(newData);
        console.log('filtered data',filteredPageData)
        setSearch(text);
      }
      else {
        console.log('elsed')
        setFilteredPageData(articlesData);
        setSearch(text)
      }
    }

    useEffect(() => {
       Page();
       HowToFilter();

      }, ['']);

  return (
    <View>


     <SearchBar
     placeholder="Search how to manuals"
     onChangeText={(text) => searchFilter(text)}
     value={search}
     />

      <FlatList

           data={filteredPageData}
           renderItem={({ item }) => <Article_cards article_card_data={item} navigation={navigation}/>}
           keyExtractor={(item, index) => index.toString()}
           showsVerticalScrollIndicator={false}

           />


    </View>
  )
}


export default Kb_howto


const styles = StyleSheet.create({
  heroImage:{
    width:50,
    height:50
  },
  heroStyle:{
    height:120,
    backgroundColor:'white',
    display:'flex',
    flexDirection:'column',
    flexWrap:'wrap'
  },
  heroHeadline:{
    width:130,
    padding:10,
    fontWeight:'bold'
  }
})
The screens you just created use a flatlist function which employs views from a file named article_cards.js under the components folder which is imported using the import code import Article_cards from '../components/article_cards';. So, create a components folder in the main branch and create article_cards.js under it and add the code shown below.
//article_cards.js
import { StyleSheet, Text, View,Image, TouchableOpacity } from 'react-native'
import React, { useState, useEffect } from 'react';
import {Card, Title, Paragraph} from
'react-native-paper';


const Article_cards = ({article_card_data, navigation}) => {
	//initial function to help check the json structure of the data received
    const Check= async() => {
        console.log('articles card console:',article_card_data.fields.knowledgebase_article_name)
    }
    useEffect(() => {

        Check();

       }, []);
  return (
    <View>
     <TouchableOpacity
	//function to pass a value when card is pressed using navigation
        onPress={() => {
            navigation.navigate('Kb_articles', {
              ArticleSlug:article_card_data.slug

            });
        }}
        style={styles.touch}
      >
        <Card style={styles.cardStyle}>

            <Card.Content>

            <Title>{article_card_data.fields.knowledgebase_article_name}</Title>
            <Paragraph>{article_card_data.fields.knowledgebase_article_summary}</Paragraph>
            </Card.Content>
            <Card.Cover source={{ uri: article_card_data.fields.knowledgebase_article_featured_image }} />
            <Card.Actions>

            </Card.Actions>
        </Card>
    </TouchableOpacity>
    </View>
  )
}


export default Article_cards
const styles = StyleSheet.create({
  cardStyle : {
    margin:7
  }
})
Create another component named category.js and add the following code to the file.
import { StyleSheet, Text, View,Image, TouchableOpacity } from 'react-native'
import React, { useState, useEffect } from 'react';
import {Card, Title, Paragraph} from
'react-native-paper';
import { useNavigation } from '@react-navigation/native'


const Categories = ({navigation}) => {


  return (
    <View>
     <TouchableOpacity
        onPress={() => {

            navigation.navigate('Kb_HowTo');
        }}
        style={styles.touch}
      >
        <Card style={styles.cardStyle}>

            <Card.Content>

            <Title>How To's</Title>
            <Paragraph>Learn more about how you can use our product.</Paragraph>
            </Card.Content>


        </Card>
    </TouchableOpacity>


    <TouchableOpacity
        onPress={() => {
            navigation.navigate('Kb_Faq');
        }}
        style={styles.touch}
      >
        <Card style={styles.cardStyle}>

            <Card.Content>

            <Title>FAQ</Title>
            <Paragraph>Get to see all the commonly asked questions and the related answers.</Paragraph>
            </Card.Content>


        </Card>
    </TouchableOpacity>
    <TouchableOpacity
        onPress={() => {
            navigation.navigate('Kb_featured_articles');
        }}
        style={styles.touch}
      >
        <Card style={styles.cardStyle}>

            <Card.Content>

            <Title>Related Articles</Title>
            <Paragraph>Get in-depth narrated articles on topics related to our product</Paragraph>
            </Card.Content>


        </Card>
    </TouchableOpacity>
    </View>
  )
}


export default Categories


const styles = StyleSheet.create({
  cardStyle : {
    margin:7
  }
})
The component above will be used to display categories on your home page.
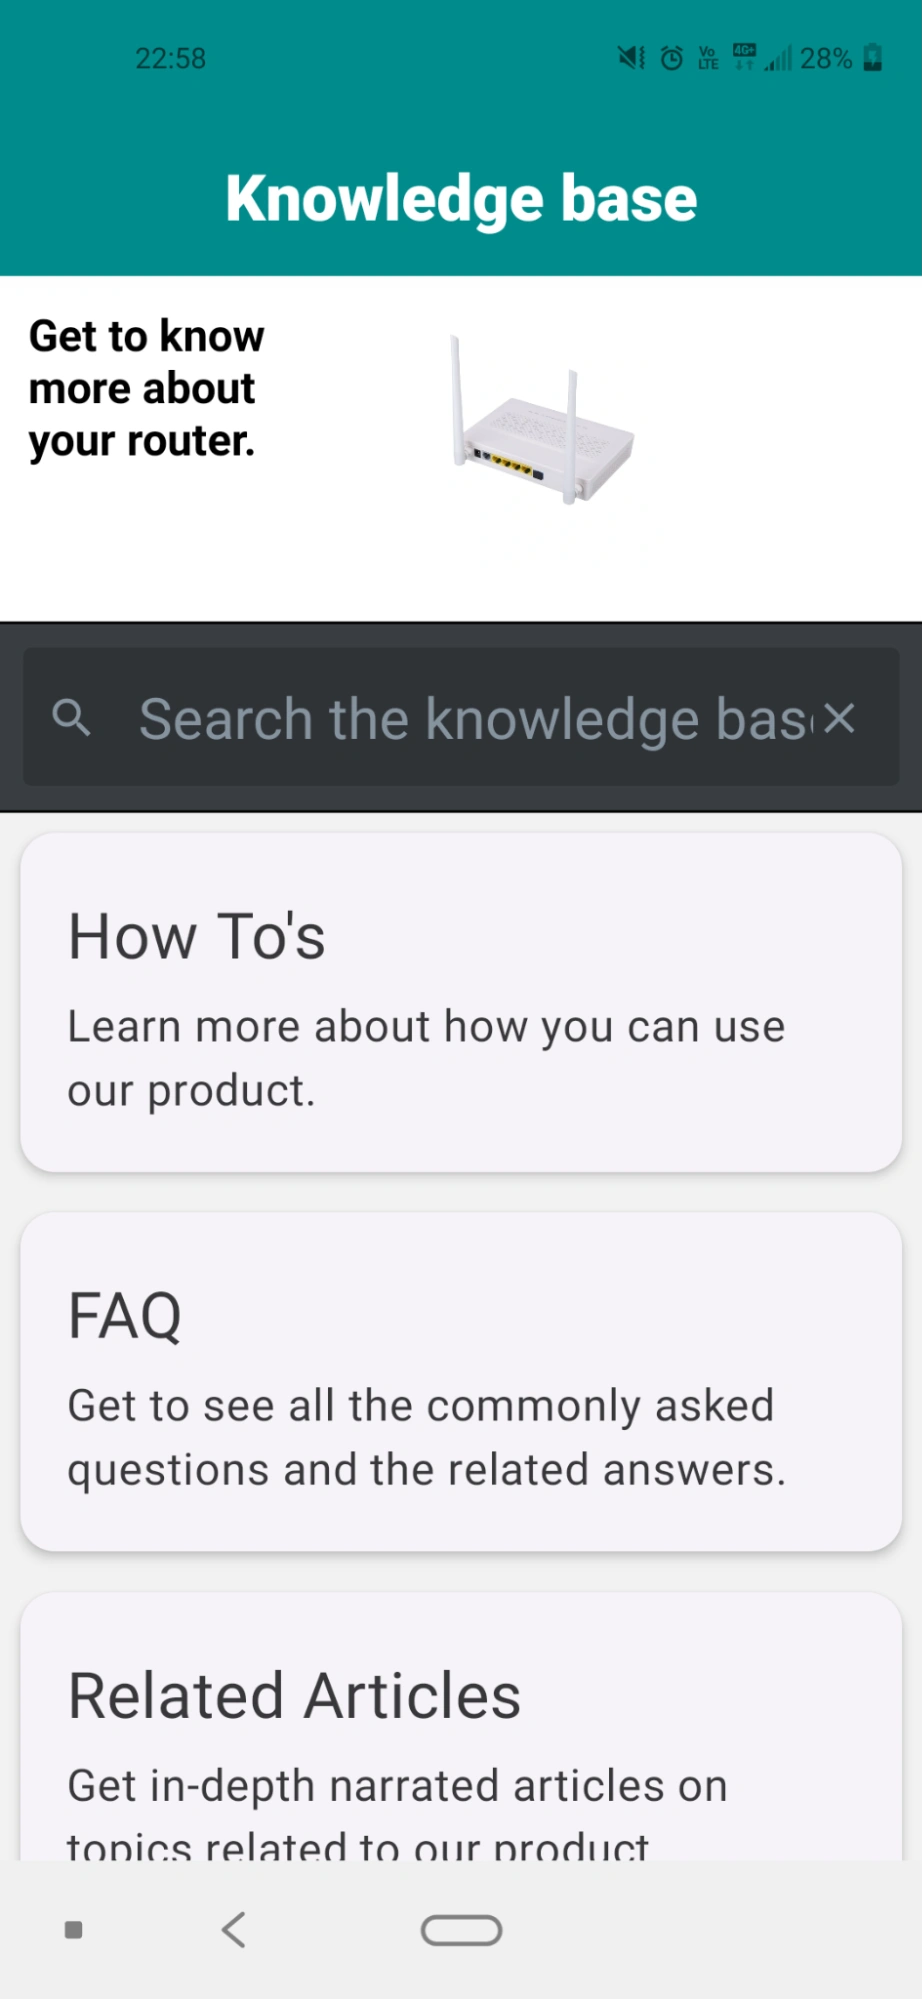
Great work! At this point, you can run the code and see the first screen. Use the npm command npm start to run the code and access expo on your smartphone and scan the QR code to watch the magic!
The code above uses the navigation module to redirect users to another screen when they click on a card. Create another file named kb_articles.js under the screens folder and add the following code.
import { StyleSheet, Text, View } from 'react-native'
import React, { useState, useEffect } from 'react';
import { WebView } from 'react-native-webview';
import butter from '../ButterCMS_Client';
const Kb_articles = ({route}) => {
const {ArticleSlug} = route.params;
const [fullPost, setFullPost] = useState([]);
const blogBody = async () => {
butter.page.retrieve('*',ArticleSlug)
.then(function(resp) {
setFullPost(resp.data.data.fields);
console.log('full post console:',fullPost)
})
}
useEffect(() => {
blogBody();
}, []);
return (
<View style={styles.container}>
<WebView style={styles.webstyle} source={{html: fullPost.knowledgebase_article_body }} />
</View>
)
}
export default Kb_articles
const styles = StyleSheet.create({
webstyle : {
width : 300,
height : 400,
},
container: {
flex: 1,
backgroundColor: '#fff',
alignItems: 'center',
justifyContent: 'center',
marginTop: 0
},
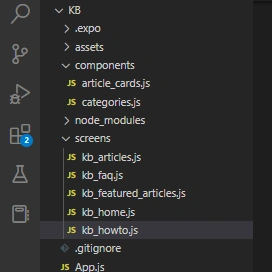
})Your file structure should look similar to the one shown below.
Configuring the search function
The search function is an important feature to have. The more your content increases, the more users will want to use the search feature. Go back to your kb_home.js file and add the code shown below.
import { StyleSheet, Text, View, FlatList,ScrollView, Image } from 'react-native';
import React, { useState, useEffect } from 'react';
import butter from '../ButterCMS_Client';
import Article_cards from '../components/article_cards';
import { SearchBar } from '@rneui/themed';


const Kb_home = ({navigation}) => {
    const [pageData, setPageData] = useState([]);
    const [filteredPageData, setFilteredPageData] = useState([]);
    const [search, setSearch] = useState([]);
    const [articlesData, setArticlesData] = useState([]);
    params = {
        'preview': 1
    }
    const Page = async () => {
        butter.page.retrieve('*', 'knowledgebase_homepage', params)
        .then(function(resp) {
            setPageData(resp.data.data.fields);
            setFilteredPageData(resp.data.data.fields.knowledgebase_article_section);
            setArticlesData(resp.data.data.fields.knowledgebase_article_section)
        })
      };
    const searchFilter = (text) => {
      if (text) {
          const newData = articlesData.filter((item) => {
          const itemData = item.fields.knowledgebase_article_name ? item.fields.knowledgebase_article_name.toUpperCase() : ''.toUpperCase();
          const textData = text.toUpperCase();
          console.log('item data:',itemData);
          console.log('text data:',textData)
          return itemData.includes(textData);
        });
        setFilteredPageData(newData);
        console.log('filtered data',filteredPageData)
        setSearch(text);
      }
      else {
        console.log('elsed')
        setFilteredPageData(articlesData);
        setSearch(text)
      }
    }

    useEffect(() => {

       Page();

      }, []);
  return (
    <ScrollView>
      <View style={styles.heroStyle}>
      <Text style={styles.heroHeadline}>{pageData.hero.headline}</Text>
      <Image source={{uri: pageData.hero.image}} style={{width: 100, height: 100}}/>
      </View>


     <SearchBar
     placeholder="Search the knowledge base"
     onChangeText={(text) => searchFilter(text)}
     value={search}
     />
      <FlatList

           data={filteredPageData}
           renderItem={({ item }) => <Article_cards article_card_data={item} navigation={navigation}/>}
           keyExtractor={(item, index) => index.toString()}
           showsVerticalScrollIndicator={false}

           />


    </ScrollView>
  )
}


export default Kb_home


const styles = StyleSheet.create({
  heroImage:{
    width:50,
    height:50
  },
  heroStyle:{
    height:120,
    backgroundColor:'white',
    display:'flex',
    flexDirection:'column',
    flexWrap:'wrap'
  },
  heroHeadline:{
    width:130,
    padding:10,
    fontWeight:'bold'
  }
})
UI and search feature results
The user experience is important as it determines if your customers will keep using your service or product. The look and feel of using a React Native application are brilliant.
Click the How To’s button to be redirected to the How To’s page.
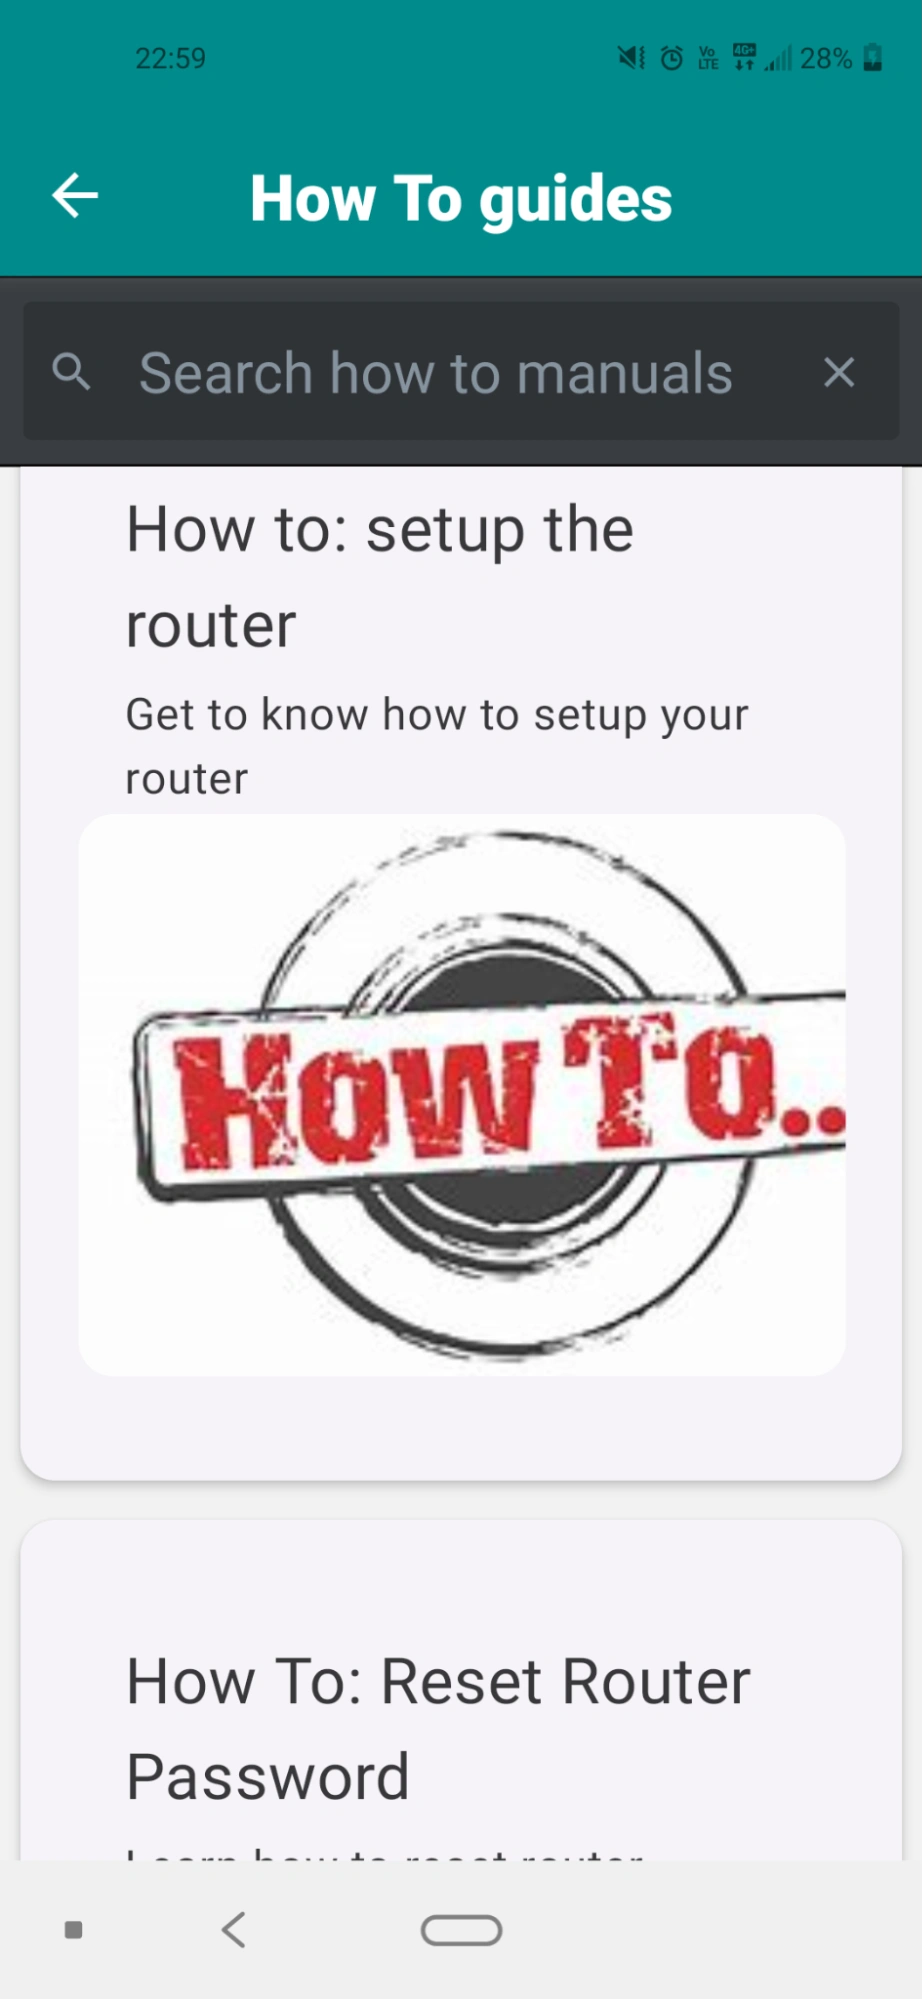
If you click on the first card, you should be able to see the second page:
Write in the search box to test the search function.
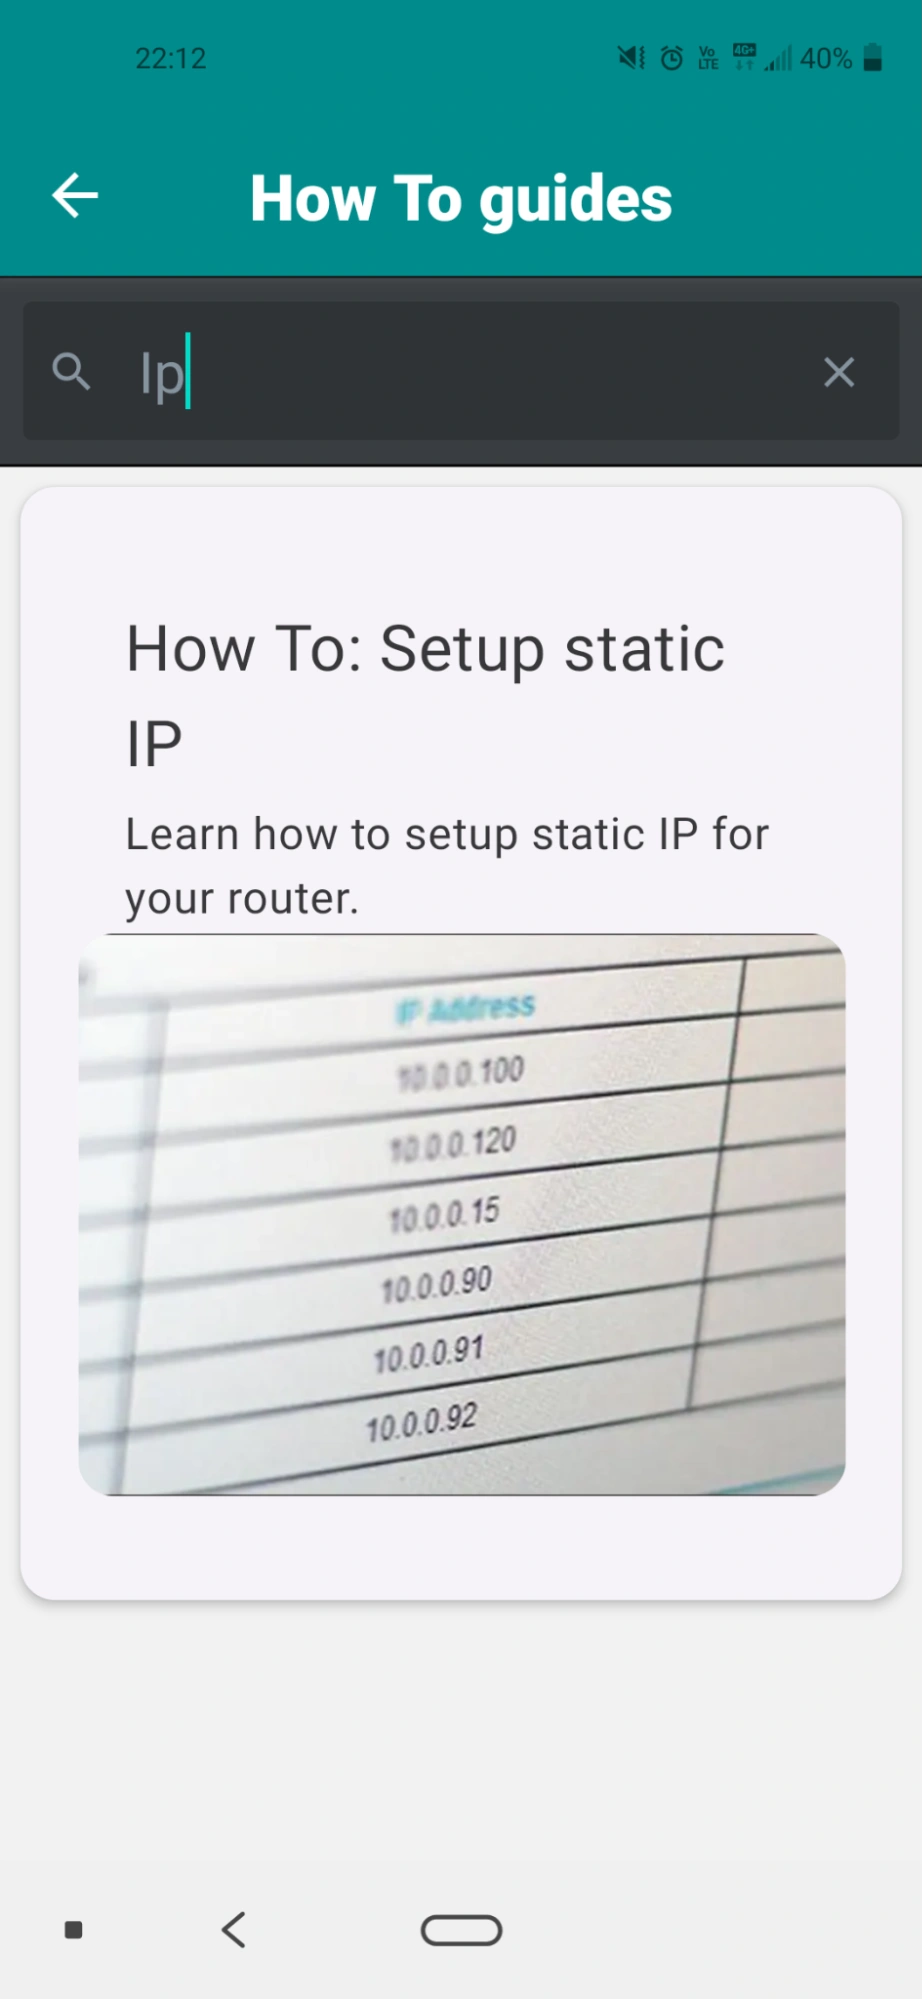
As you can see, the search function works as expected.
Closing thoughts
Good work making it to this point. You managed to combine two powerhouses—React native and ButterCMS—to create a knowledge base for your clients and workers. Using React Native with ButterCMS can save you time while improving efficiency.
Having a knowledge base can help you manage all the information associated with your company. This will allow you to ensure your customers always get up-to-date feedback at any time.
There is still much more you can add to your project which is outside of the scope of this tutorial. I encourage you to add your own flare to the project and just run with it.
Make sure you receive the freshest React Native tutorials and Butter product updates.
ButterCMS is the #1 rated Headless CMS


Related articles
Don’t miss a single post
Get our latest articles, stay updated!
Levis Masonde is a software developer with a passion for coding in React Native and Python as well as keeping up with new innovations with plans to raise awareness of programming.