Automate accessibility tests with Storybook
Use Accessibility addon to run checks during development and the test runner to catch regressions

Accessibility is the practice of making apps usable for everyone. That means ensuring your app is compatible with assistive technologies, supports keyboard navigation, high color contrast modes, reduced motion, and more.
The most accurate way to verify UI accessibility is to test it manually on real devices. But manual testing requires significant effort so most teams use automated tools like Axe as the first line of defense.
This article shows how to run automated accessibility tests with Storybook. You'll learn how to configure Storybook test runner to run Axe on all your components and snapshot the accessibility tree.

Test accessibility as you code
It's easier to fix accessibility issues while you code than after the app is deployed. Automated tools like Axe work by auditing the rendered DOM. This enables developers to catch and resolve defects while building UIs.
Axe runs checks based on WCAG rules and other industry-accepted best practices. Using Axe doesn't automatically make your UI accessible, but it can find 57% of WCAG issues on average.
Storybook's Accessibility addon runs Axe on the currently selected story and visualizes the test results in the accessibility panel. It can even outline DOM nodes to help you pinpoint violations at a glance.
While working on a component, you can cycle through its stories to verify its appearance and spot accessibility issues.
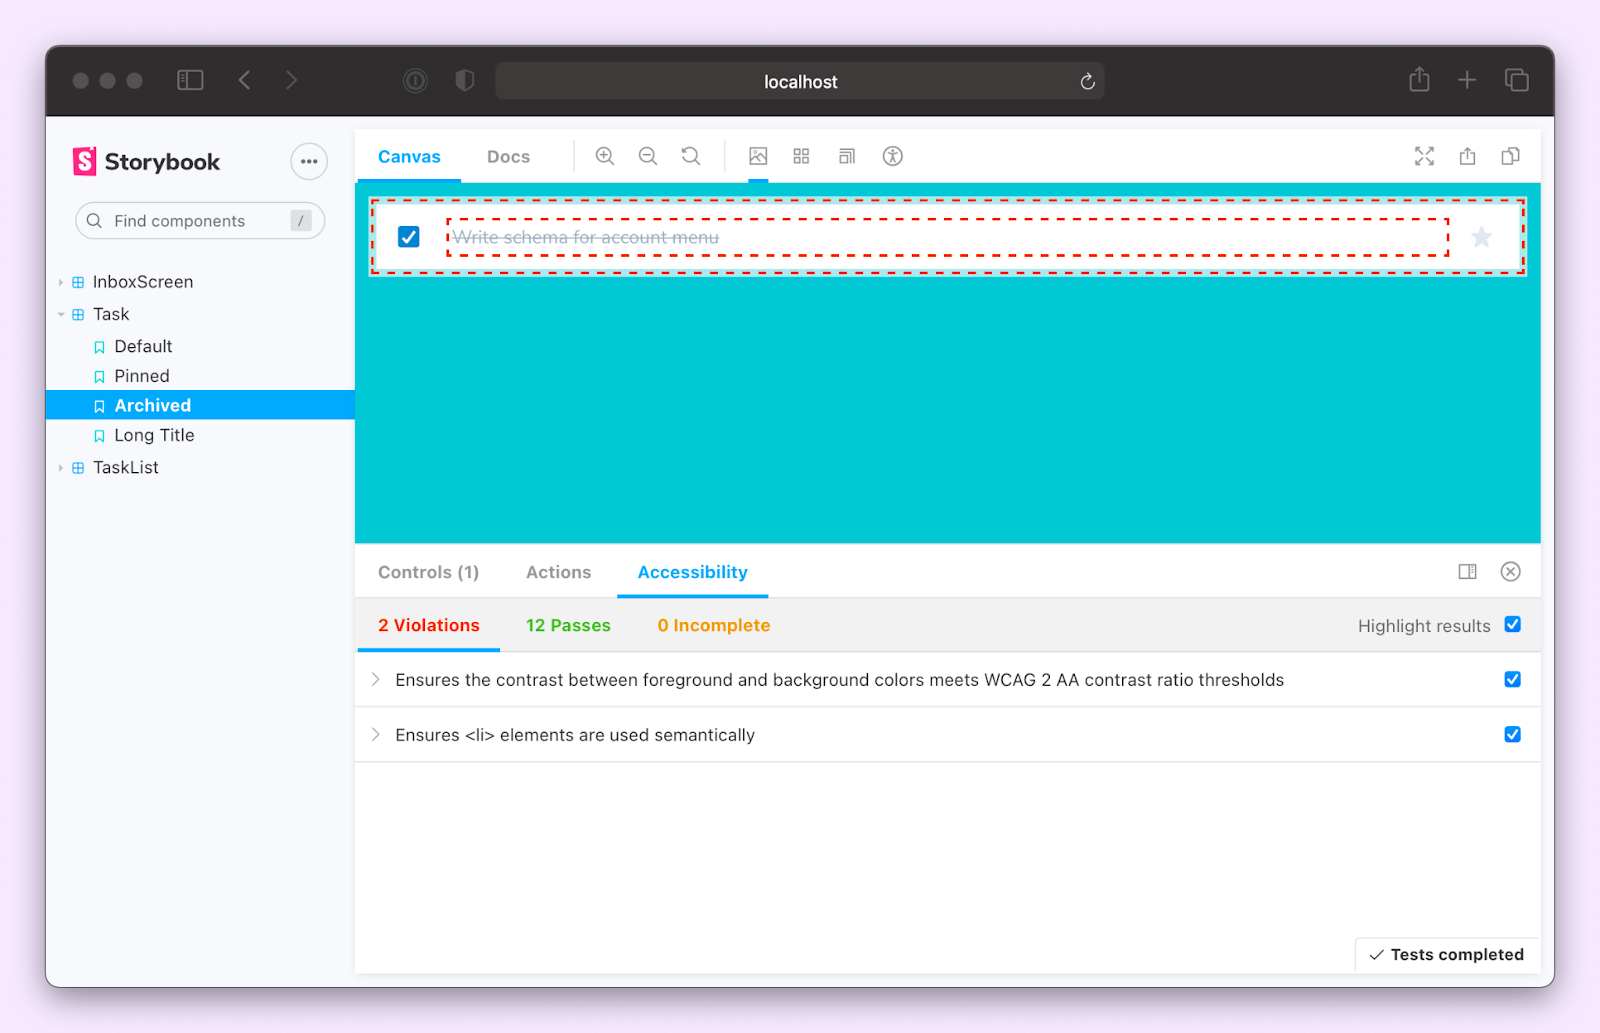
Refer to the setup guide for more information on using and configuring the A11y addon.
Catch accessibility regressions automatically
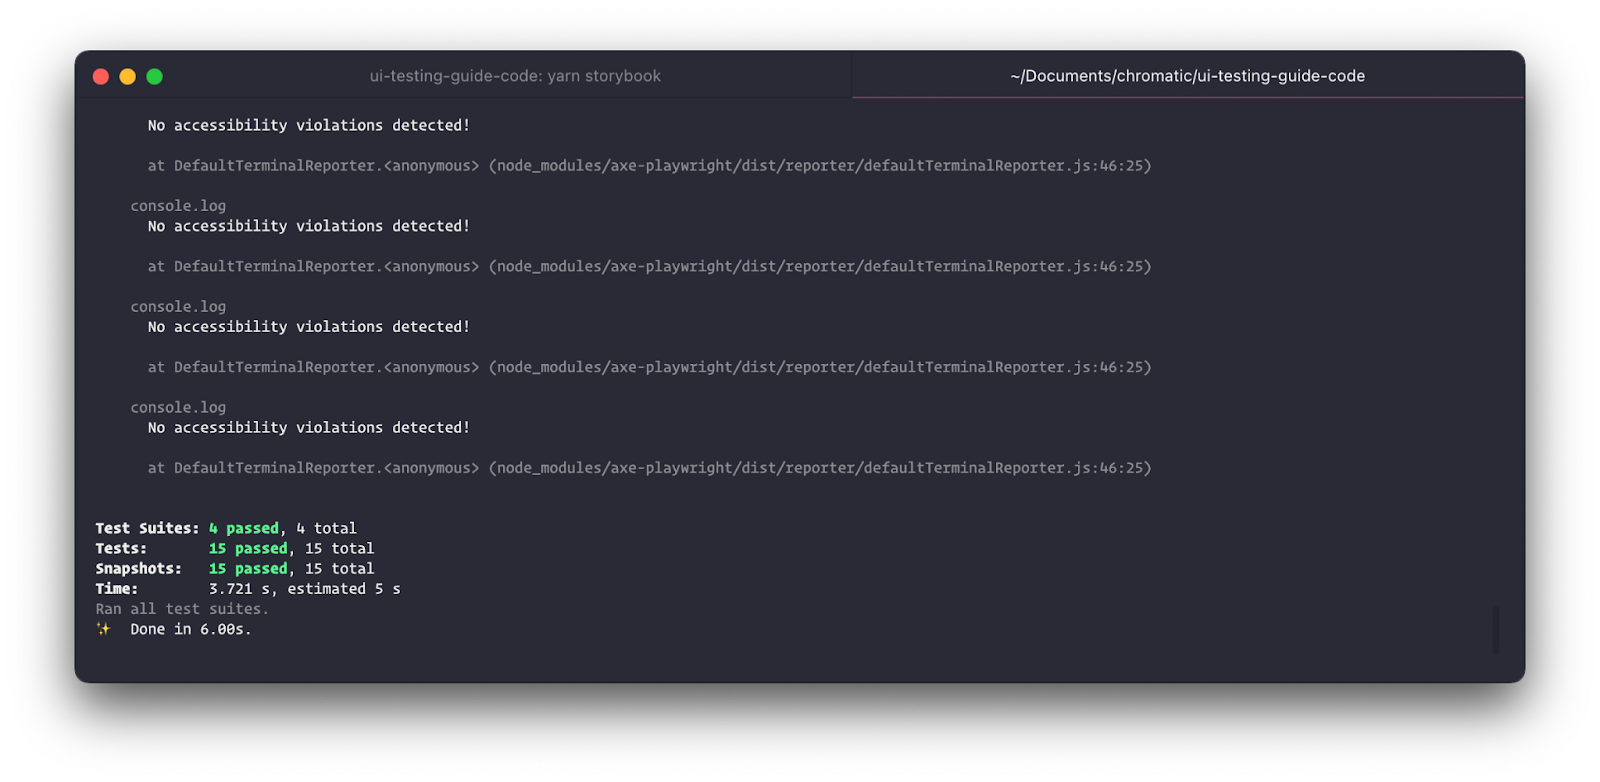
Changes to a component can unintentionally introduce new accessibility issues. To catch such regressions, you'll want to test all your stories before opening a pull request.
The Accessibility addon only runs checks when you’re viewing a story. We want to run Axe on all stories at once via the Storybook test runner. It’s a standalone utility (powered by Jest and Playwright) that checks for rendering errors in stories.
Let’s go ahead and set up the test runner and configure it to run Axe. We’ll start by installing the test runner and related packages (note, it requires Storybook 6.4 or above).
npm i -D jest @storybook/test-runner axe-playwright
And install playwright dependencies:
npx playwright install --with-depsYou can then integrate these accessibility tests into your test automation pipeline using the Storybook test runner and axe-playwright.
Add a new configuration file inside your Storybook directory with the following inside:
// .storybook/test-runner.js

const { injectAxe, checkA11y } = require('axe-playwright');

module.exports = {
 async preRender(page, context) {
   await injectAxe(page);
 },
 async postRender(page, context) {
   await checkA11y(page, '#root', {
     detailedReport: true,
     detailedReportOptions: {
       html: true,
     },
   })
 },
};
preRender and postRender are convenient hooks that allow you to configure the test runner to perform additional tasks. We're using those hooks to inject Axe into a story, and then once it renders, run the accessibility test.
You’ll notice a few options passed into the checkA11y function. We’ve set up Axe to start at the story's root element and then traverse down the DOM tree to check for issues. It will also generate a detailed report based on the issues it encountered and output a list of HTML elements that violated accessibility rules.
To run the tests, add a script for the test runner to you package.json.
{
  "scripts": {
    "test-storybook:ci": "yarn test-storybook --maxWorkers=2"
  }
}
Then start your Storybook in one terminal window with npm run storybook and the test runner in another with npm run test-storybook.
Export the test results
By default, the results are reported via the CLI. To export them instead, switch to the getViolations function and use Node’s fs API to save them to a JSON file.
// .storybook/test-runner.js

const { injectAxe, getViolations } = require('axe-playwright');
const fs = require('fs');

module.exports = {
 setup() {
   fs.mkdir(
     process.cwd() + '/src/__accessibility__/',
     { recursive: true },
     (err) => {
       if (err) throw err;
     }
   );
 },
 async preRender(page, context) {
   await injectAxe(page);
 },
 async postRender(page, context) {
   const violations = await getViolations(page, '#root', {
     detailedReport: true,
   });

   // Do something with violations
   // For example, write them to a file
   await new Promise((resolve, reject) => {
     fs.writeFile(
       process.cwd() + `/src/__accessibility__/${context.id}.json`,
       JSON.stringify(violations, null, 2),
       (err) => {
         if (err) reject(err);
         resolve();
       }
     );
   });
 },
};
Snapshot the accessibility tree to check page structure
Blind and visually impaired users rely on assistive technologies like screen readers to understand and interact with your UI. Browsers convert your markup into an internal representation called the accessibility tree. It's the mechanism that enables screen readers to parse your UI and translate the visual interface into speech.
Snapshotting the accessibility tree helps you understand how the UI is being parsed by these assistive devices. You can check whether the page structure is correct and that content is presented in the proper order. What's more, track and diff these snapshots to catch regressions as you modify or update the UI.
// .storybook/test-runner.js

const { injectAxe, checkA11y } = require('axe-playwright');

module.exports = {
 async preRender(page, context) {
   await injectAxe(page);
 },
 async postRender(page, context) {
   await checkA11y(page, '#root', {
     detailedReport: true,
     detailedReportOptions: {
       html: true,
     },
   });

   const accessibilityTree = await page.accessibility.snapshot();
   expect(accessibilityTree).toMatchSnapshot();
 },
};
Conclusion
26% of adults in the United States have at least one disability. Improving accessibility can have a substantial impact on your user base.
Automated accessibility testing acts as the first line of QA to catch blatant accessibility violations. While automation doesn't automatically make your UI accessible, it does shorten the feedback loop by allowing you to spot issues during development.
The Storybook Accessibility addon audits your stories and highlights offending DOM nodes. Once you're ready to merge, use the Storybook test runner to run checks on all your components to catch regressions.
Learn how to use the test runner in CI with our getting started guide.
Automated accessibility tests speed up your workflow and catch blatant violations.
— Storybook (@storybookjs) May 19, 2022
New tutorial—learn how to run a11y checks with Storybook.
♿ Use a11y addon to test as you code
🤖 Catch regressions with test runner
🌲 Snapshot the a11y tree with hookshttps://t.co/OZbnN0Az7o pic.twitter.com/Xzrbqy3Xb7